I have always thought terracotta is the most honest material in a garden, warm, imperfect, and better looking the older it gets. What I love about rustic terracotta garden decor is how many ways it shows up, from a crumbling patina pot leaning against a wall to a grand olive jar anchoring a gravel courtyard or a simple herb trough on a sunny step. Every look here is one you can genuinely steal, whatever size your outdoor space happens to be.
Why Vintage Terracotta Pots Always Look Right at Home
Aged terracotta carries something a brand new pot simply cannot fake: the soft white salt bloom, the uneven lip, the colour that shifts from amber to rust in different light. What I love about grouping graduated vintage pieces is that the garden looks like it grew slowly over years, not like it arrived on a flatbed truck last Tuesday. You get instant warmth and that slightly imperfect quality that makes a space feel genuinely lived in.
The Key Details
Graduated vintage terracotta pot grouping
Reclaimed limestone pavers
Trailing rosemary and bay plantings
Low rendered garden wall
Weathered iron pot feet
Pro TipSearch out estate sales, reclamation yards, and old kitchen gardens rather than antique shops, because the pots there have usually spent decades outside and carry the best natural weathering.
AvoidBuying reproductions made from composite or resin saves money upfront, but the surface stays too smooth and too uniform, and up close they read as cheap no matter how you style them.
How to Age a New Terracotta Pot So It Earns Its Place in the Garden
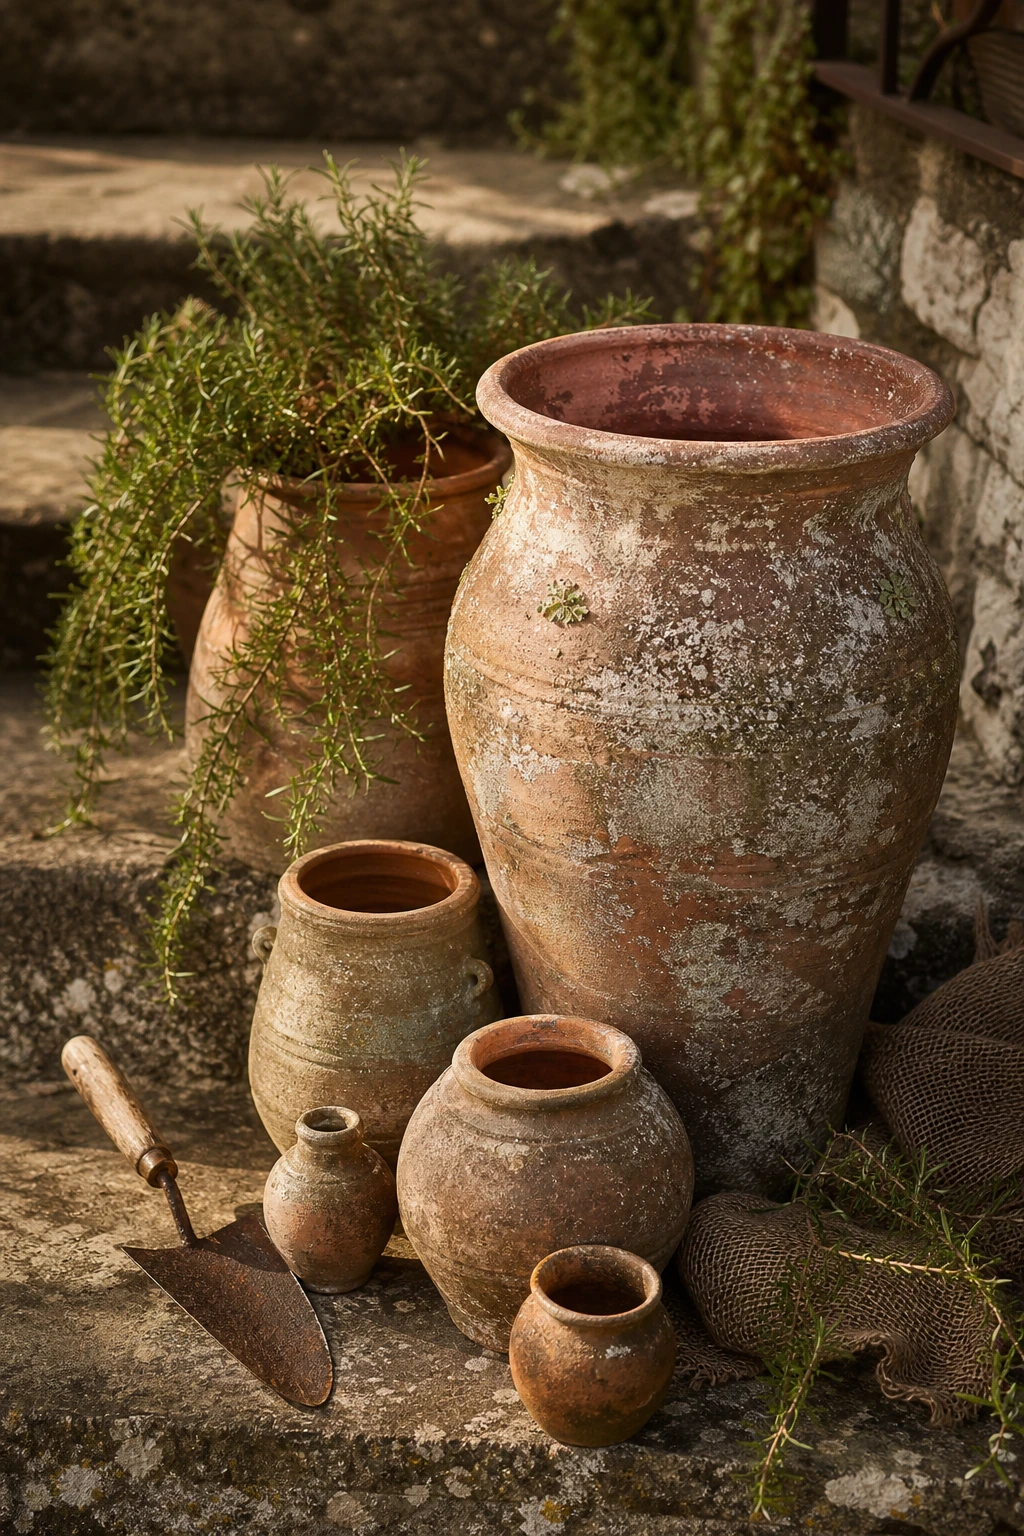
A brand new pot straight from the garden centre has smooth, uniform skin that the garden never quite trusts, and that is the problem I am always trying to solve. Paint it and you get a costume. Let the clay breathe and absorb moisture over time and you get genuine character. What I love most is how graduating sizes of hand thrown crocks read like a family that has lived together for decades, especially once moss creeps in at the base and the lip starts to bloom white with minerals.
The Key Details
Hand thrown clay crocks in graduating sizes
Reclaimed stone steps
Trailing rosemary and creeping moss
Worn iron trowel
Chalky mineral deposit patina on pot surfaces
Pro TipBrush diluted yoghurt or buttermilk onto the outside of a damp pot and set it somewhere shaded, and you will see soft green moss beginning to colonise the surface within a few weeks.
AvoidRushing the process by roughing up the surface with sandpaper gives you texture, but the scratches look mechanical rather than weathered, and up close the pot still reads as new.
The Patina on Old Terracotta Pots and How to Protect It
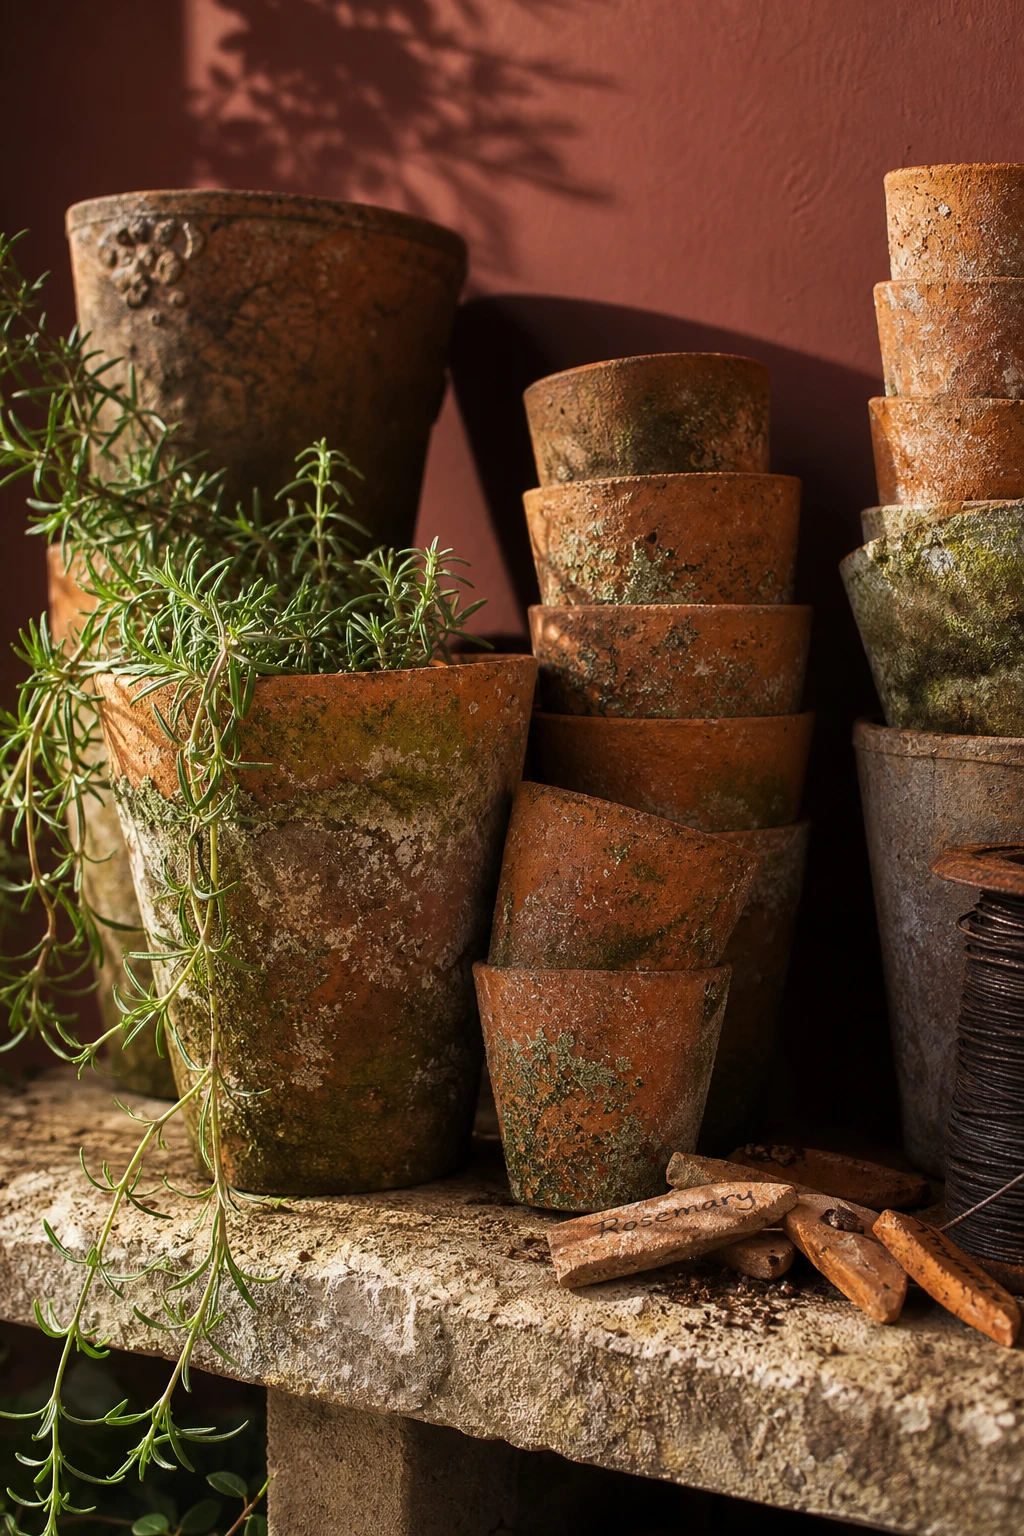
That silver white bloom and the soft green moss creeping up the sides of an old pot? That is the garden doing the decorating for you, and I think it beats anything you could buy. You get a depth and warmth that only years of weather and minerals can build, and the graduating heights let each pot show a slightly different story. Watch how that rough stone shelf underneath grounds the whole thing, making the patina feel deliberate rather than neglected.
The Key Details
Aged terracotta pots in graduating heights
Salt bloom and mineral crust patina on clay
Moss growth patches on pot exteriors
Rough hewn stone display shelf
Terracotta shard soil markers
Pro TipBrush a thin coat of a breathable beeswax sealant over dry pots in late autumn and the patina locks in beautifully through frost and wet winters without turning the clay shiny.
AvoidScrubbing pots with a stiff brush before winter strips the mineral crust and moss in minutes, and once that patina is gone it takes years of weather to rebuild it.
Hanging Terracotta Pots on a Wall Turns a Bare Fence Into a Garden Feature
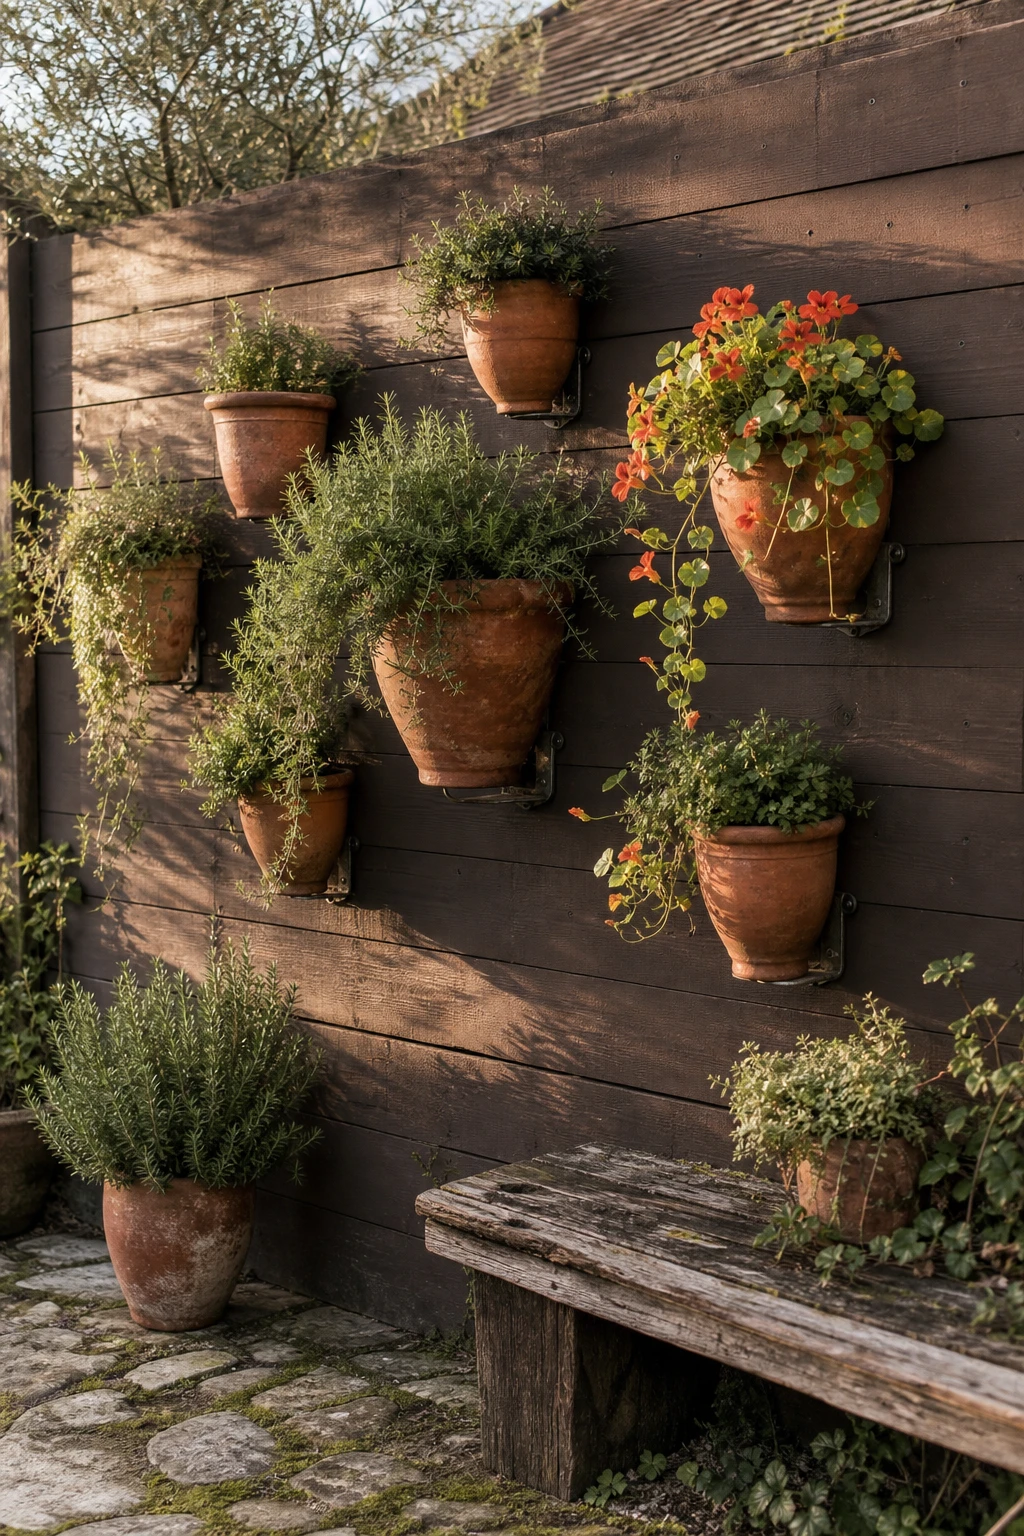
A bare fence disappears the moment you layer it with hung terracotta pots, and what I love most is how the vertical plane becomes just as interesting as the beds below. Graduating the pot sizes draws the eye upward in a natural rhythm, and you get that warm, earthy tone stacked against weathered timber in a way that feels lived in rather than decorated. Watch how trailing herbs soften the edges and blur the line between the wall and the garden.
The Key Details
Graduated wall hung terracotta pots
Galvanised iron wall mounting brackets
Weathered timber fence boards
Trailing and cascading herb plantings
Reclaimed timber bench below display
Pro TipFix a masonry anchor or a heavy duty screw in hook rated for at least twice the filled pot weight, because wet compost in a clay pot is far heavier than you expect.
AvoidSpacing pots too far apart leaves awkward gaps that make the whole display feel unfinished and thin, so keep clusters close enough that the greenery from one pot almost touches its neighbour.
Grouping Garden Pots Together Is the Easiest Way to Make a Terracotta Display Feel Curated
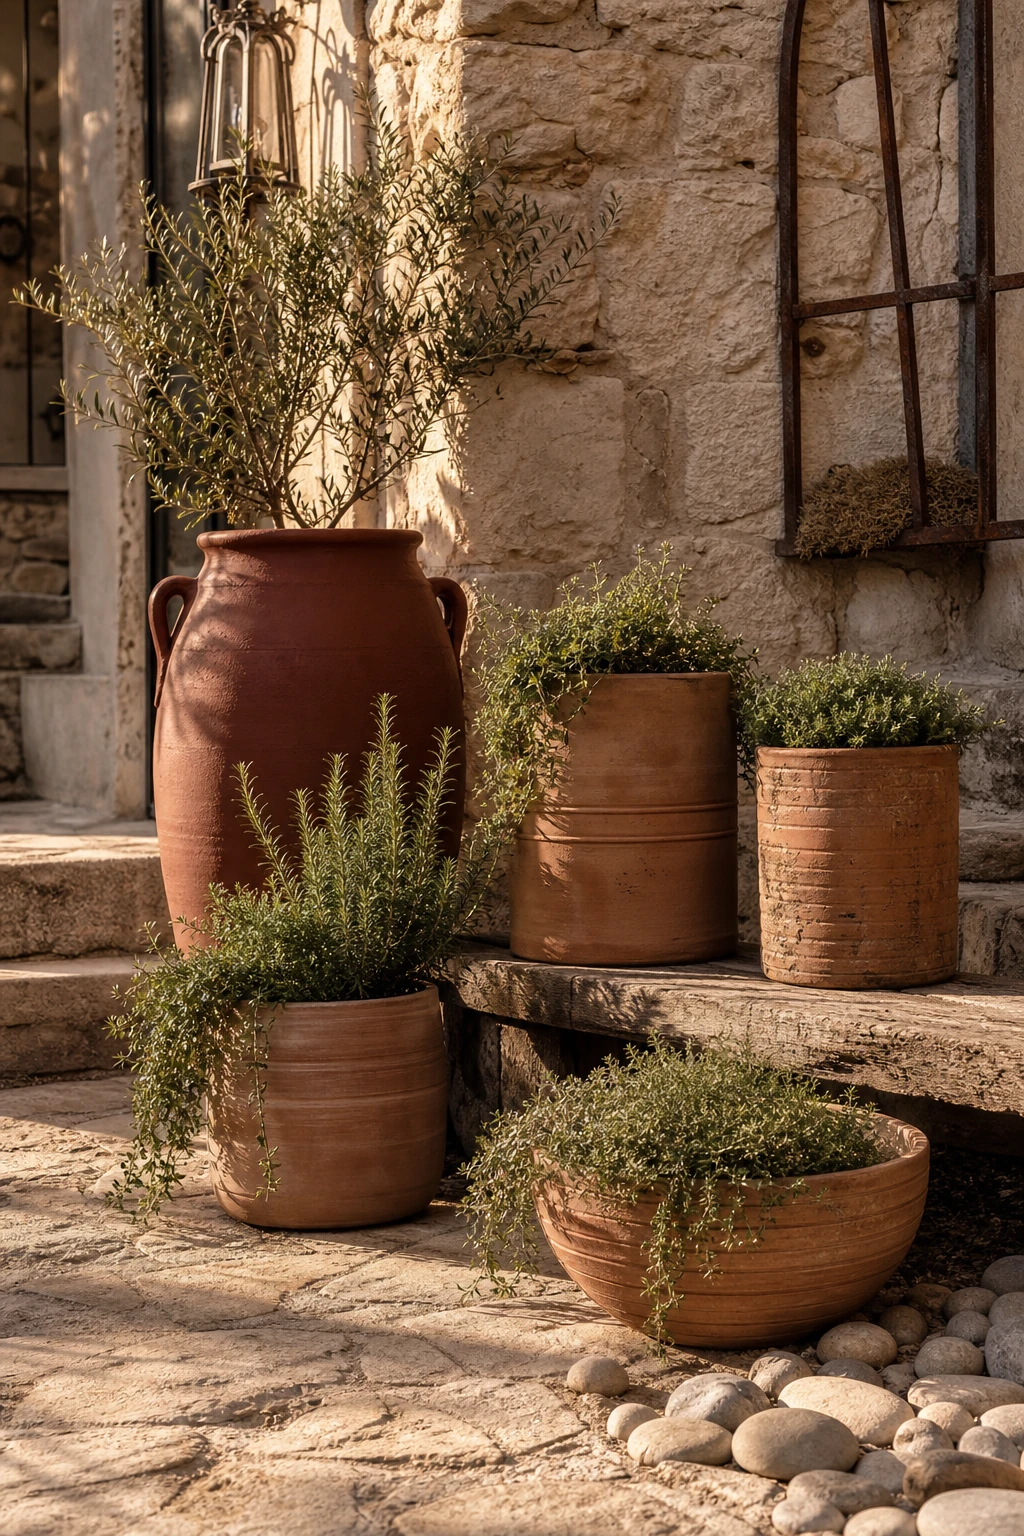
Grouping pots in threes or fives is one of my favourite moves because the eye naturally settles on odd numbers and reads them as intentional. Vary the heights and you get a little skyline that draws the gaze up, across, and back down again. What I love most is how the warm terracotta tones tie everything together even when the shapes and sizes are all different, so the group feels collected rather than cluttered.
The Key Details
Varied height terracotta urns and bowls
Trailing herb plantings
Reclaimed timber bench
Weathered limestone paving
River pebble base dressing
Pro TipPlace your tallest pot at the back, your widest in the middle, and your shortest at the front so every piece stays visible and the group reads as one composed moment.
AvoidLining pots up in a single straight row flattens the whole display and strips out the depth that makes a grouped arrangement feel considered rather than leftover.
A Broken Terracotta Pot Can Become the Most Charming Thing in Your Garden
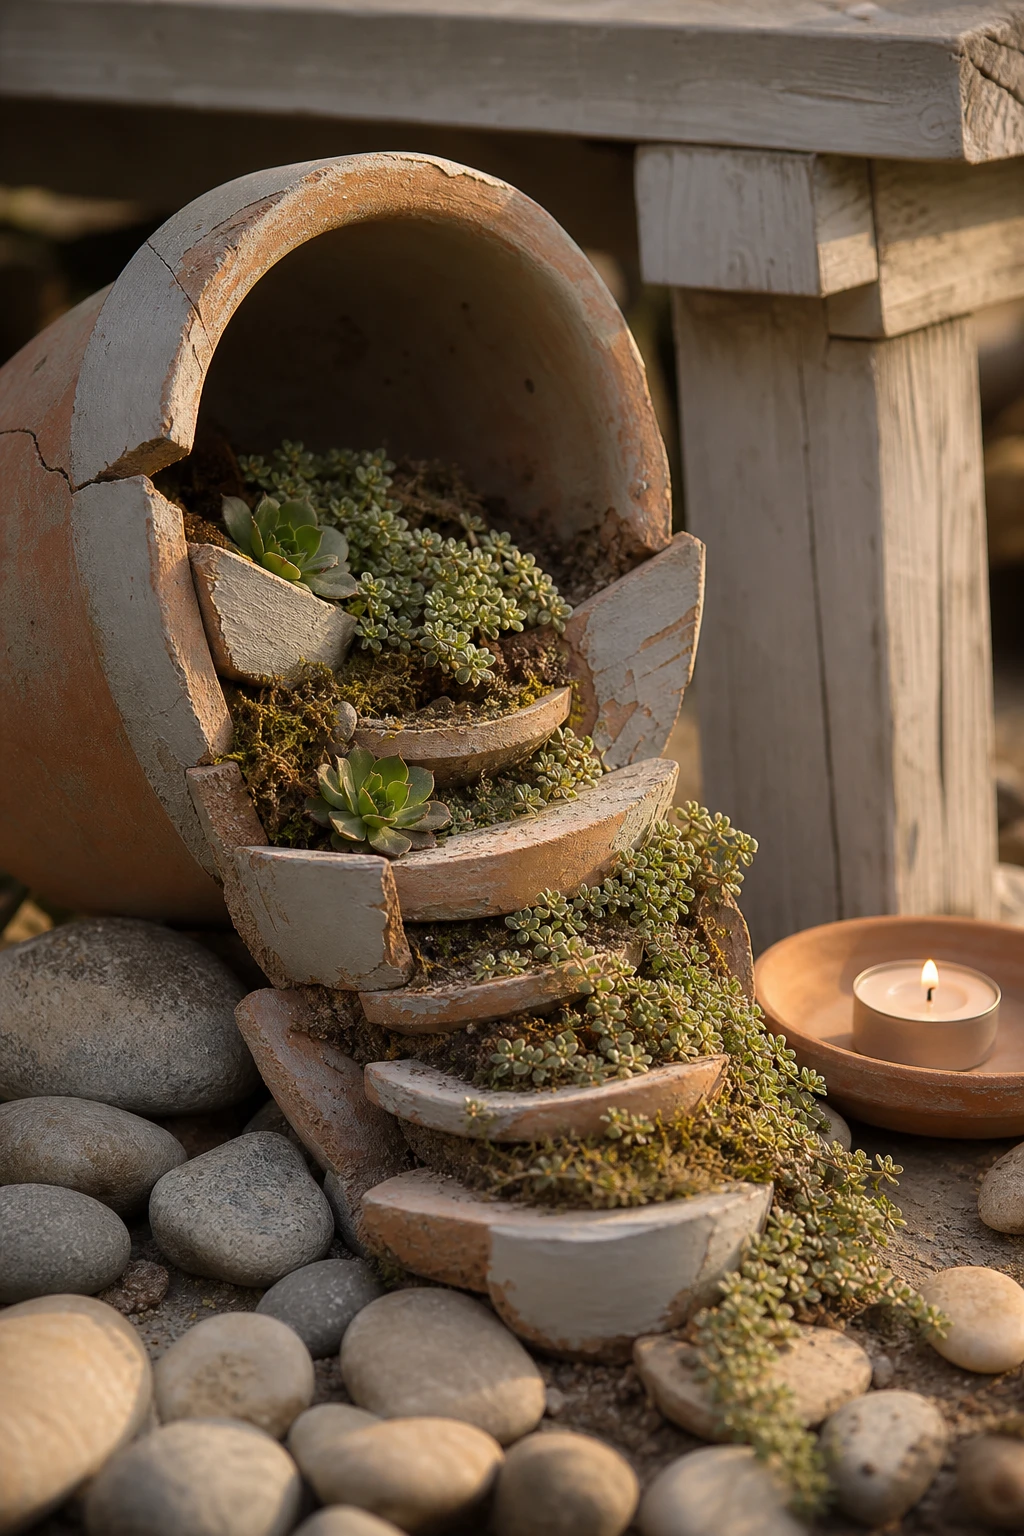
Broken pot art is one of those happy accidents I genuinely love sharing, because the crack becomes the whole point rather than something to hide. You arrange the shards in a gentle staircase down the soil, then let trailing plants spill through each gap as if the garden itself is escaping. What wins me over is how the rough, uneven edges read as texture rather than damage, giving the scene a storybook quality that a perfect pot never could.
The Key Details
Cracked terracotta pot arranged in shard staircase formation
Cascading succulents and creeping thyme plantings
River pebble border at pot base
Weathered timber garden bench backdrop
Terracotta saucer tealight holder
Pro TipTuck creeping thyme into the lower shards so it roots directly into the soil beneath, anchoring the whole arrangement and softening the base as it spreads.
AvoidThrowing a cracked pot straight into the bin means losing a ready made planter that already has built in drainage, personality, and a head start on that weathered look most gardeners spend years trying to achieve.
A Terracotta Pot Person Brings Playful Character to Any Garden Corner
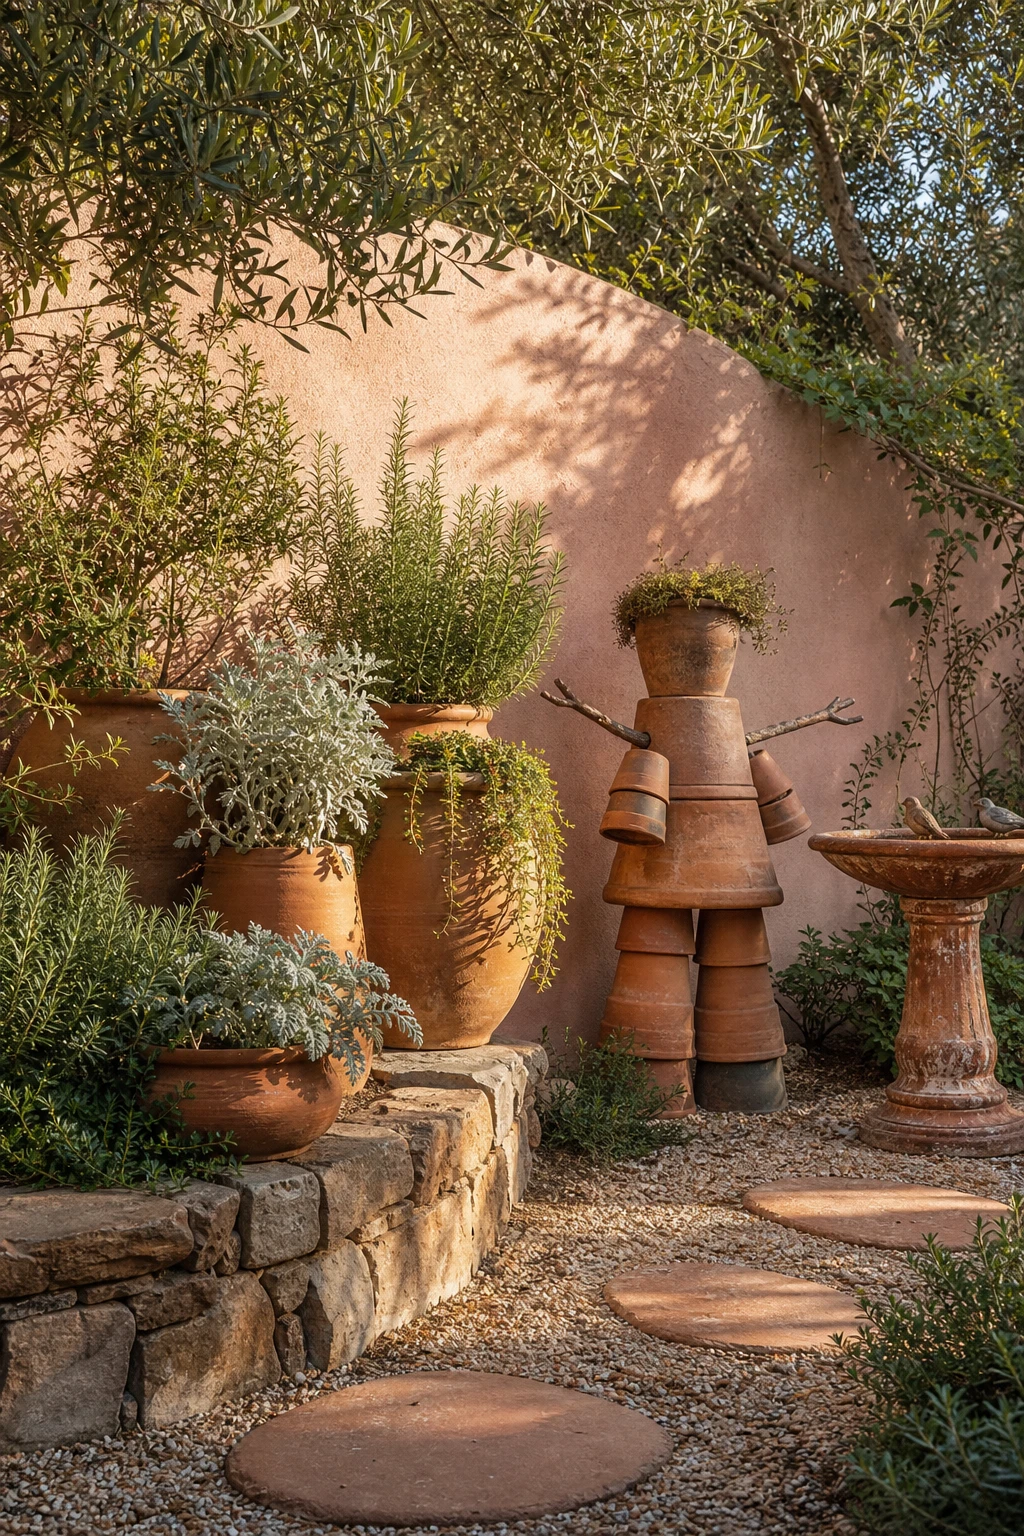
A pot person tucked into a garden corner wins me over every time because the humour is quiet, not shouty. You get a focal point that makes visitors smile without demanding the whole scene bow to it. What I love is how the stacked forms echo the round pots already scattered through the border, so the figure feels like it grew there rather than arrived from a garden centre.
The Key Details
Stacked terracotta pot sculpture
Hand thrown terracotta planters
Terracotta birdbath
Natural gravel path with terracotta stepping stones
Trailing rosemary and dusty miller plantings
Pro TipThread a length of rebar through the centre of each stacked pot before you add the head, and the whole figure will stand firm even on a breezy day.
AvoidScaling the figure too tall pulls every eye straight past the planting and the surrounding garden loses all its quiet charm.
One Large Terracotta Pot Outdoors Can Do the Work of an Entire Garden Bed
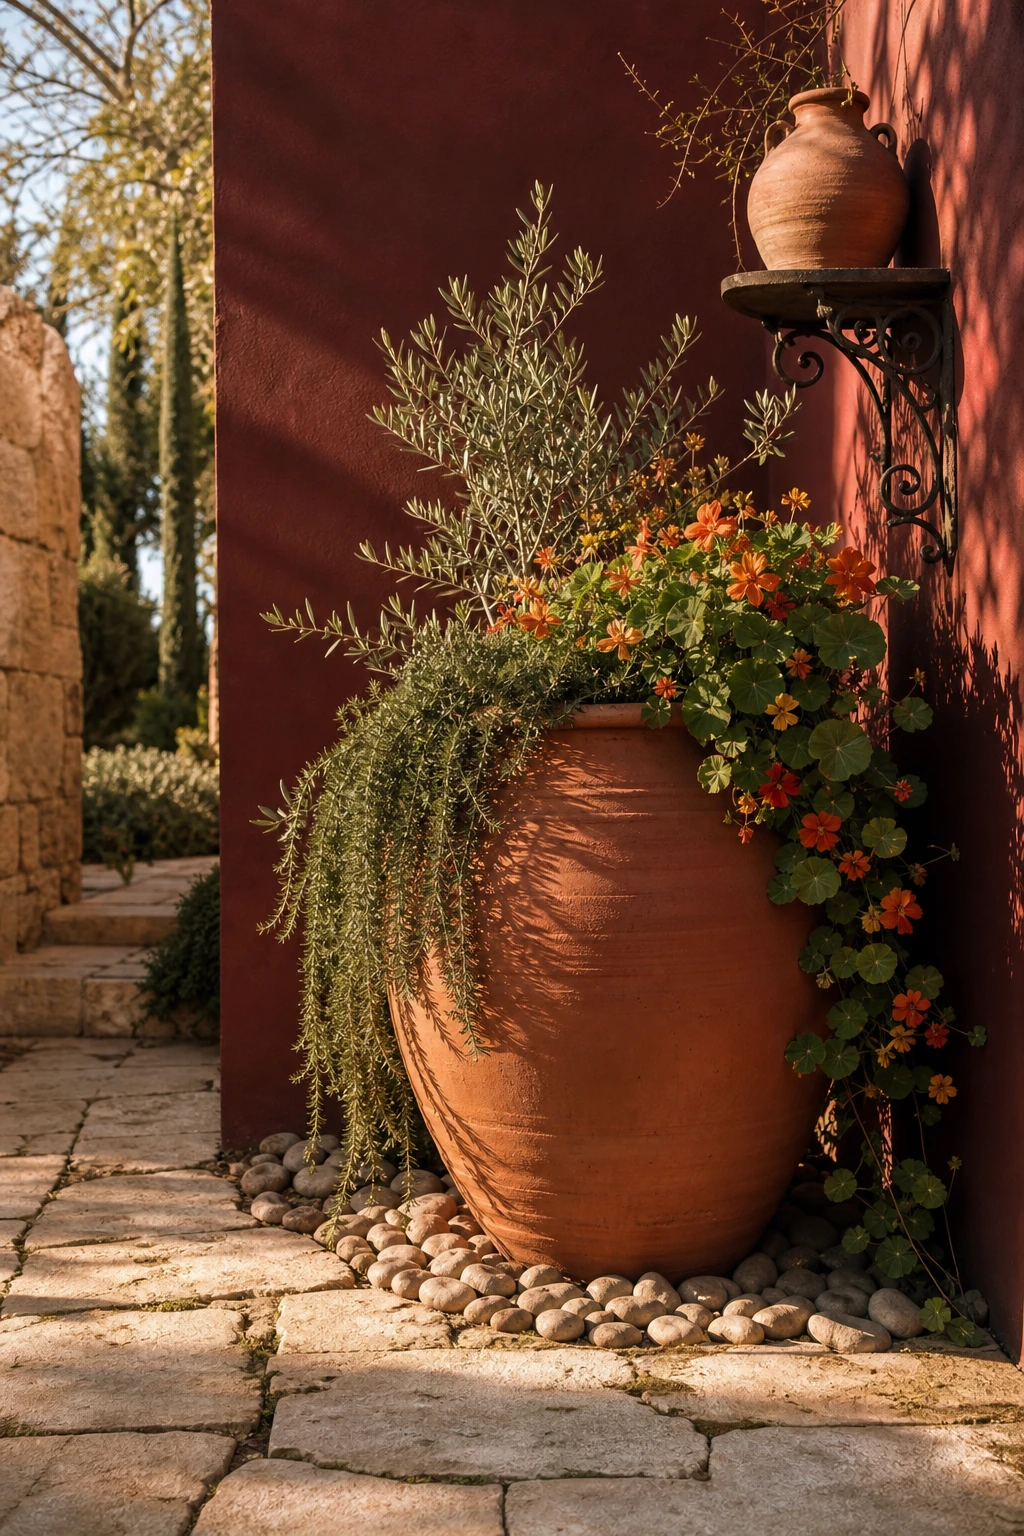
One bold pot placed with intention stops a garden in its tracks, and that is exactly the point. What I love about a large terracotta vessel is the weight it gives a space, grounding a terrace or path corner the way a sofa anchors a room. You get all the lushness of a planted bed without losing a square metre of paving, and the warm clay tone pulls everything around it into a coherent scene.
For a compact courtyard, use the small Mediterranean garden layout to check where one focal pot can stand without blocking the seat or route.
The Key Details
Oversized hand thrown terracotta pot
Aged limestone paving
Weathered iron wall bracket
River pebble mulch
Trailing rosemary and nasturtium planting
Pro TipFill the bottom third of a large pot with scrunched plastic bottles or lightweight perlite before adding compost, so you cut the overall weight without reducing planting depth.
AvoidPlanting a small single stem in a statement pot leaves the whole composition looking accidental and a little sad, so choose plants that will billow to the rim and spill over the sides.
Small Terracotta Pots Packed Together Create a Look That Feels Far Bigger Than They Are
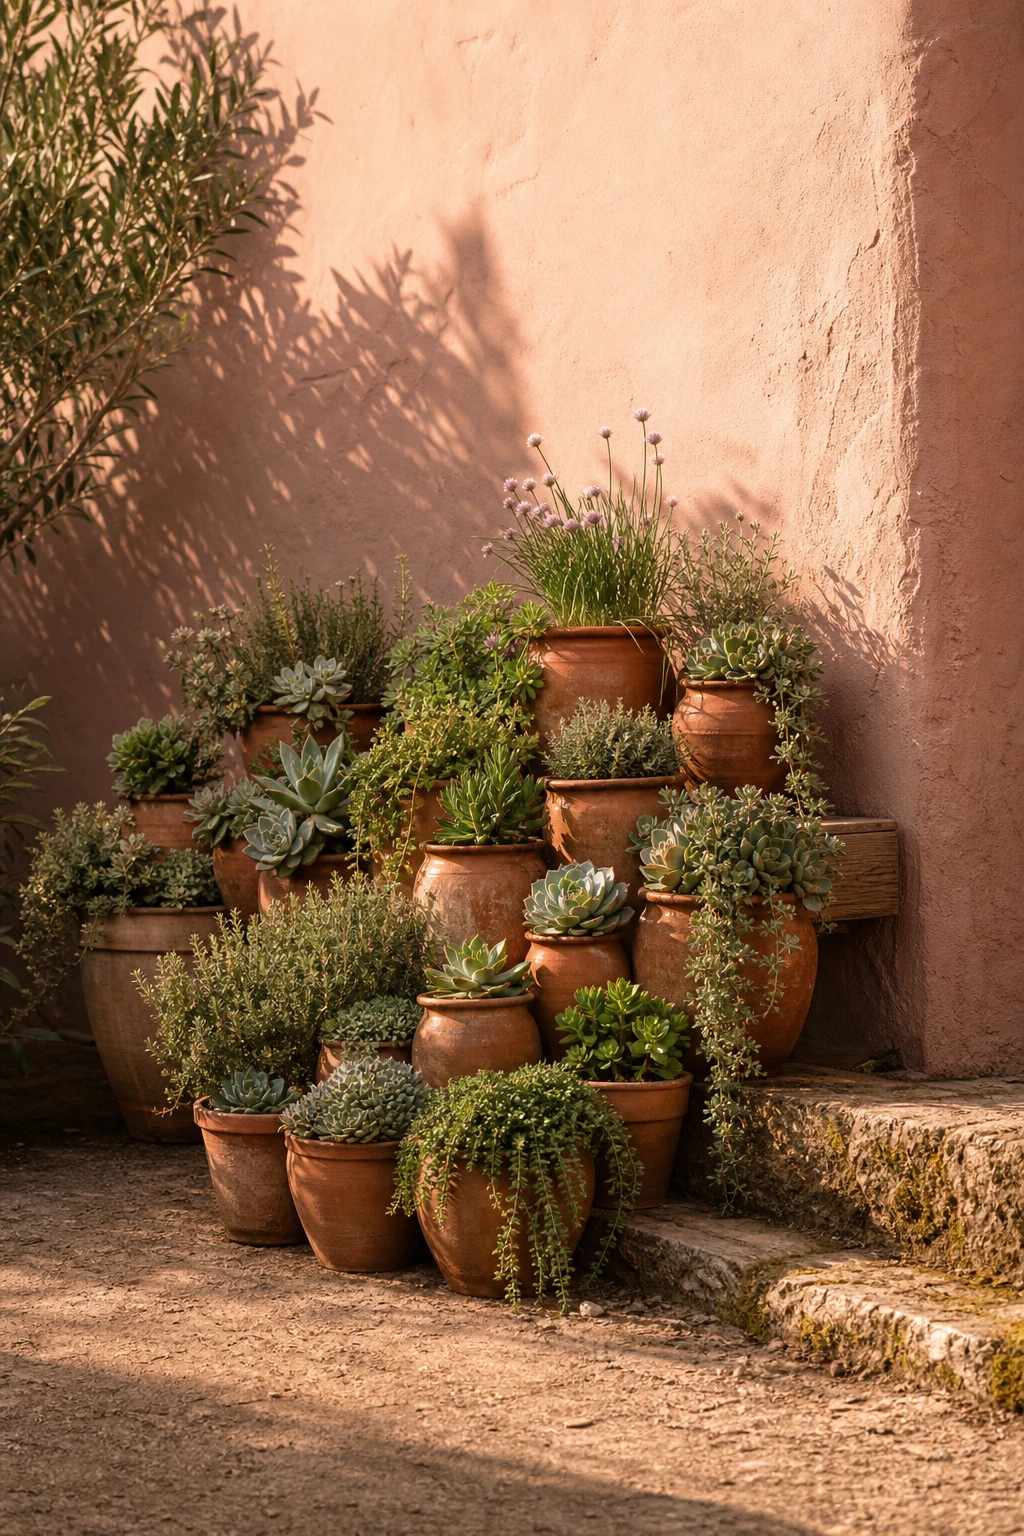
Small pots clustered together is one of my favourite tricks for making a modest collection punch well above its weight. You get that sense of abundance and density without needing large statement pieces, and the varying heights keep your eye moving so the whole display feels alive. What I love is how the group reads as one generous arrangement rather than a scattering of lonely little vessels, and the warm terracotta tones tie it all together even when the shapes are completely different.
The Key Details
Tiered reclaimed timber plant riser
Mixed height unglazed terracotta pots
Trailing and mounding succulent planting
Weathered stone ledge surface
Rendered lime plaster garden wall
Pro TipSet your cluster on a single shallow tray so the pots sit as one cohesive unit and any watering mess stays contained underneath.
AvoidSpacing small pots too far apart dilutes the impact completely, turning what should feel like a lush arrangement into a handful of forgettable dots.
A Wide Shallow Terracotta Bowl Changes the Whole Mood of a Garden Table
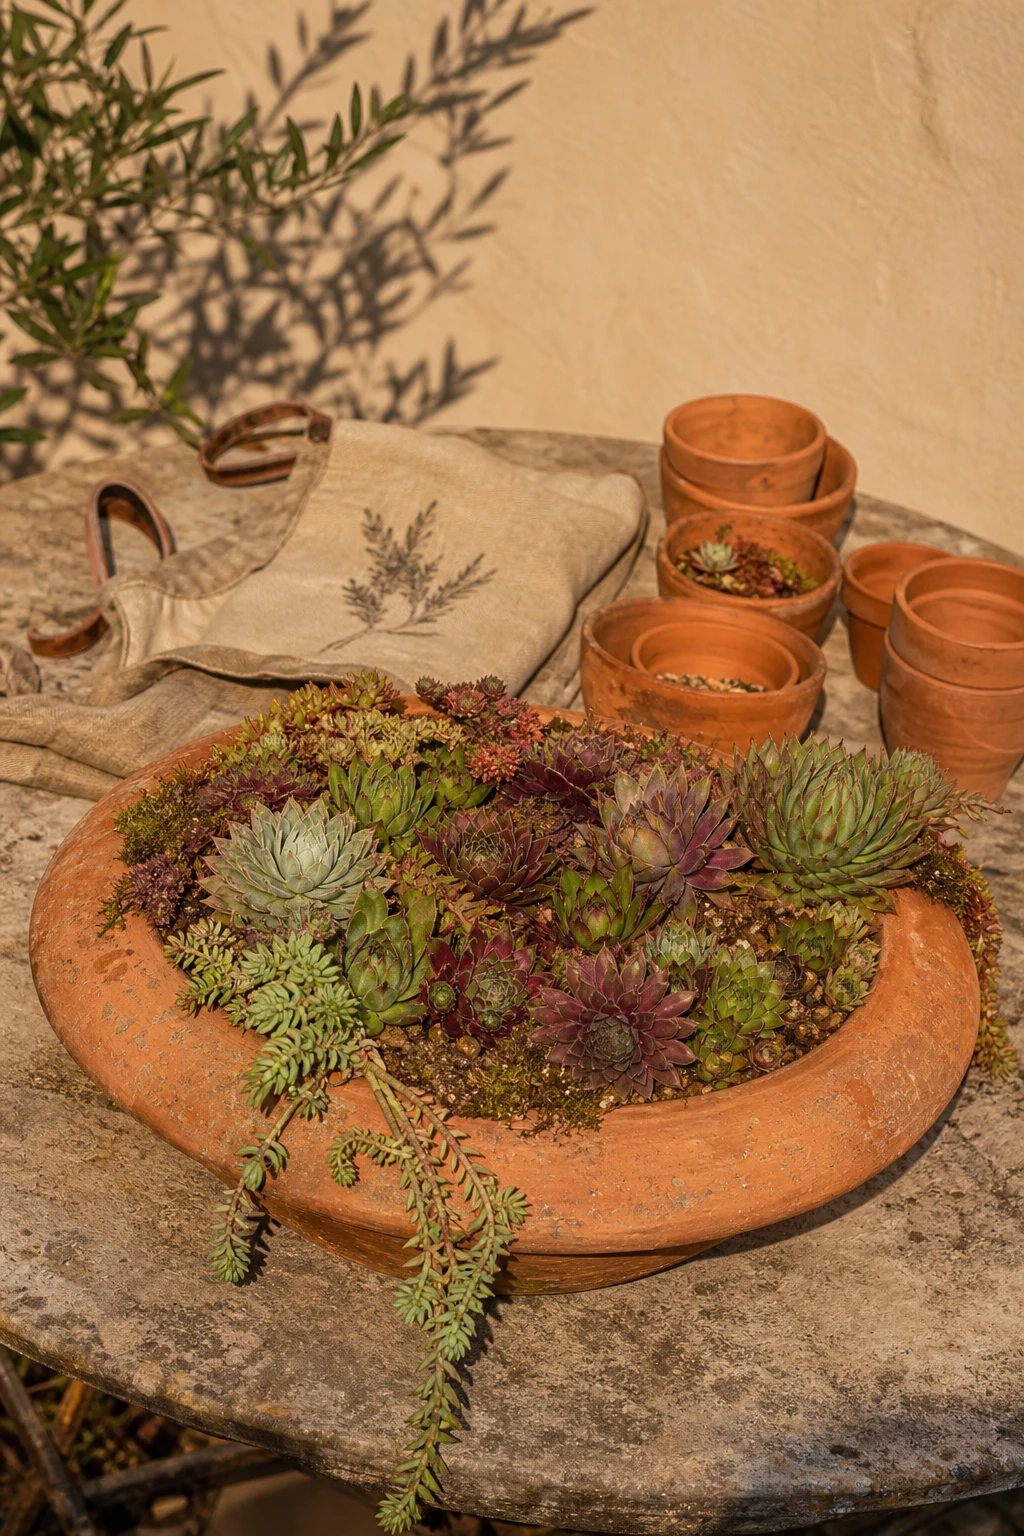
A shallow bowl spread wide across a garden table pulls the eye down and out rather than up, and that low horizontal line is what gives a table setting its calm, considered feel. What I love about this shape is how honestly it pairs with succulents: the roots stay happy, the rosettes spill over the rim, and you get something that looks designed without much effort at all. The weathered terracotta colour ties it back to the stone surface beneath, so the whole arrangement reads as one quiet, settled scene.
The Key Details
Wide shallow bowl pot
Hen and chick succulents
Weathered stone table surface
Grouped round terracotta pots
Trailing sedum plantings
Pro TipPlant a mix of hen and chick varieties at different growth stages so the bowl keeps evolving and filling in over the whole season.
AvoidPlanting anything deep rooted in a shallow bowl leads to a rootbound plant within weeks, and once that happens the whole display collapses fast.
An Olive Jar Is the One Piece That Makes a Garden Feel Like It Has a Soul
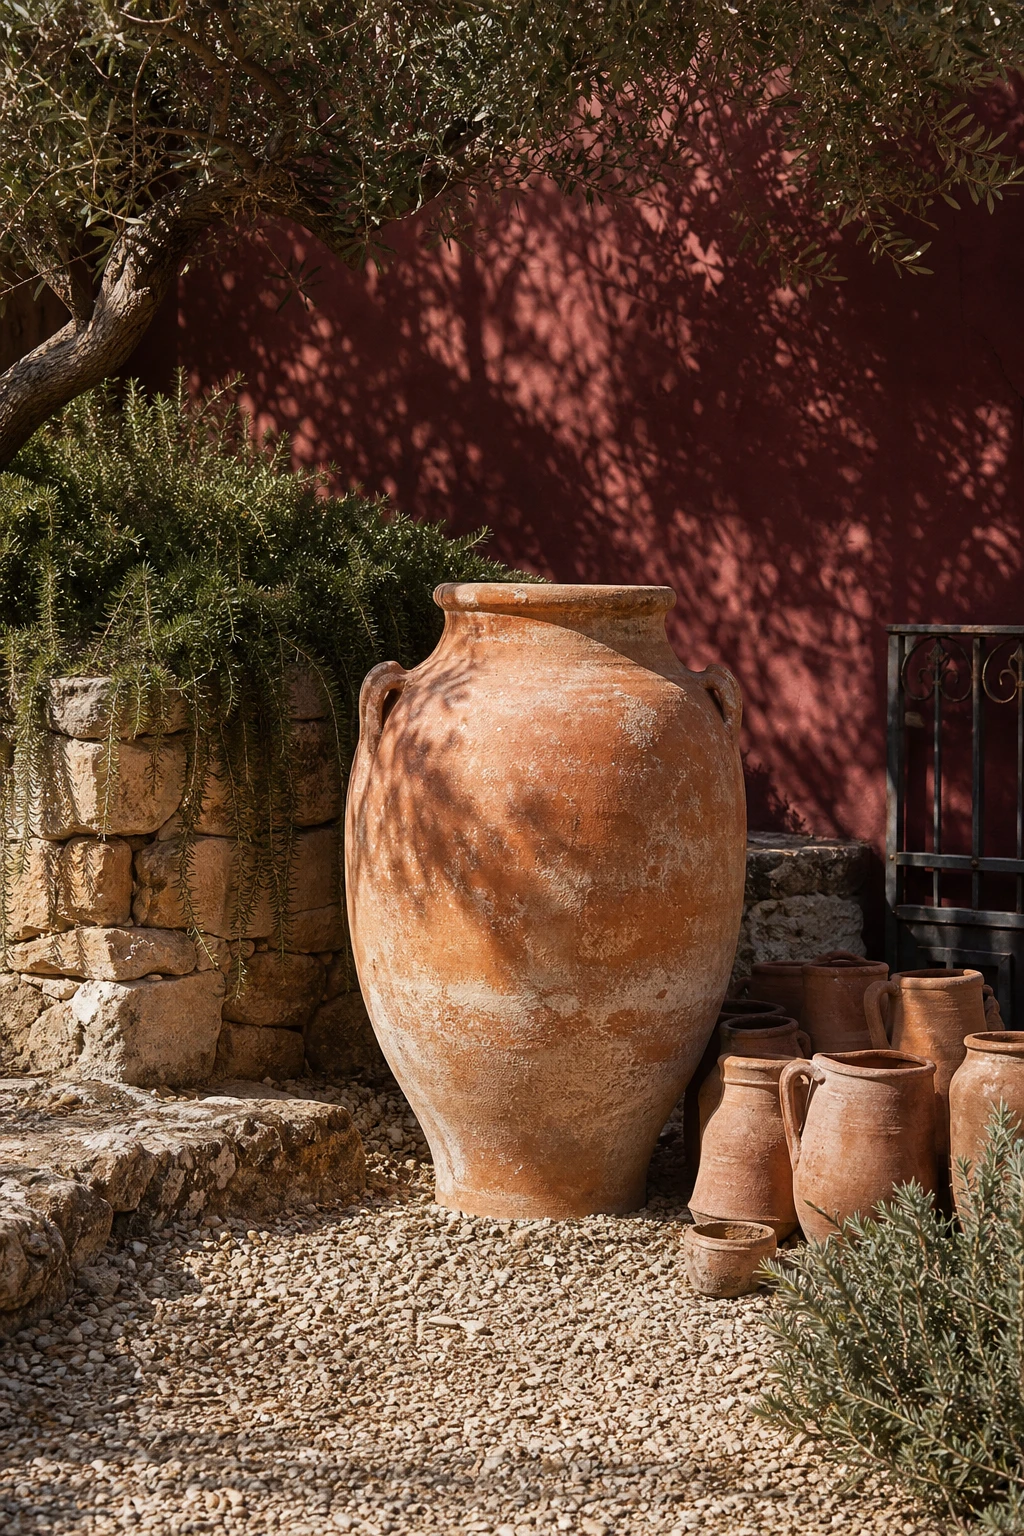
An olive jar standing empty is one of my favourite moves in a garden: the absence of planting is exactly the point. You get pure form, ancient and unhurried, and the eye just rests on it. What wins me over every time is how the belly of the jar catches raking afternoon light, the curves deepening into shadow and making the whole thing feel like it was unearthed rather than bought. Pair it with gravel, a low stone wall, and a gnarled olive overhead and you have a scene that feels lived in across centuries.
The Key Details
Oversized amphora olive jar urn
Weathered gravel ground cover
Low crumbling stone perimeter wall
Gnarled olive tree canopy
Stacked hand thrown terracotta pots
Pro TipSet the jar at a slight diagonal to the sun’s path so the widest part of the shoulder catches the warm, low light from the side in the afternoon and the shadow line shifts visibly as the day moves.
AvoidPlanting directly inside a genuine antique olive jar traps moisture against ancient clay and the freeze thaw cycle will crack it within a season or two.
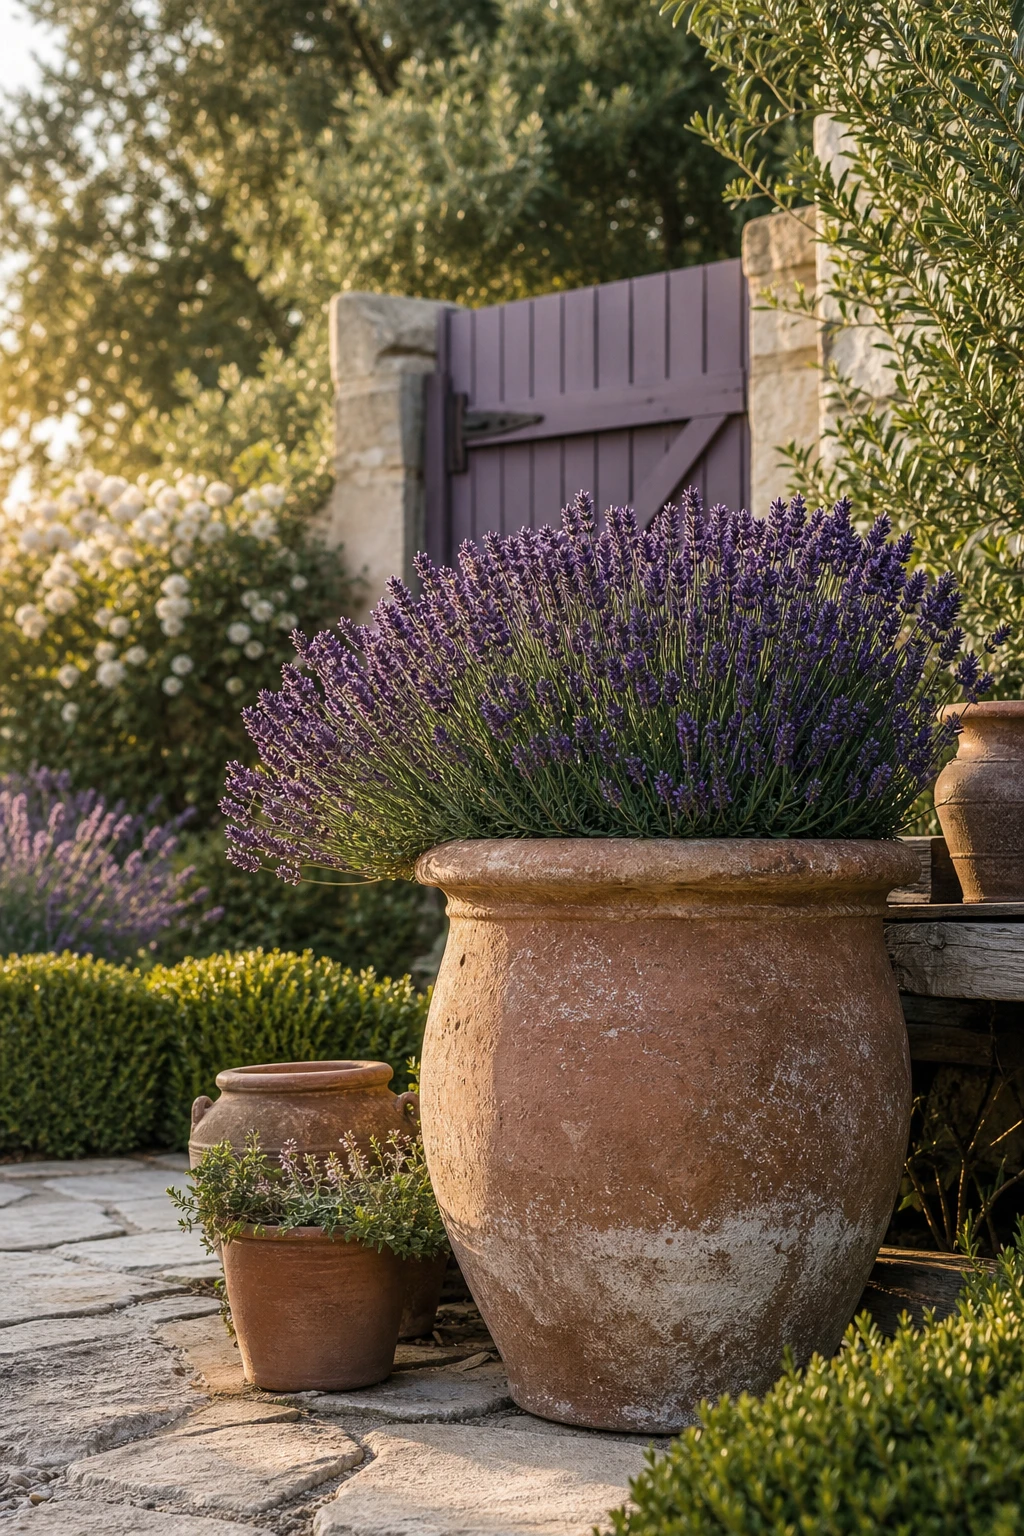
Lavender in a Large Terracotta Pot Is a Pairing That Never Needs Improving
Lavender and terracotta share the same warm, dusty undertones, so the two colours settle against each other rather than fight. What I love about this pairing is how the purple haze of the flowers deepens the burnt orange of the pot, and you get a richness from both that neither could produce alone. The aged surface of the terracotta adds texture that a smooth glazed pot never would, and that roughness makes the soft lavender spikes feel even more delicate by contrast.
The Key Details
Aged terracotta pot
Limestone paving
Dense lavender planting
Timber garden gate
Clipped boxwood hedge
Pro TipCut lavender back by about a third immediately after the flowers fade, taking it down to just above the woody growth, and your pot plant will stay compact and full rather than sprawling open in the middle.
AvoidWatering lavender on a fixed schedule in a terracotta pot means the roots stay wet far longer than the plant wants, and root rot will kill it quietly before you notice anything is wrong.
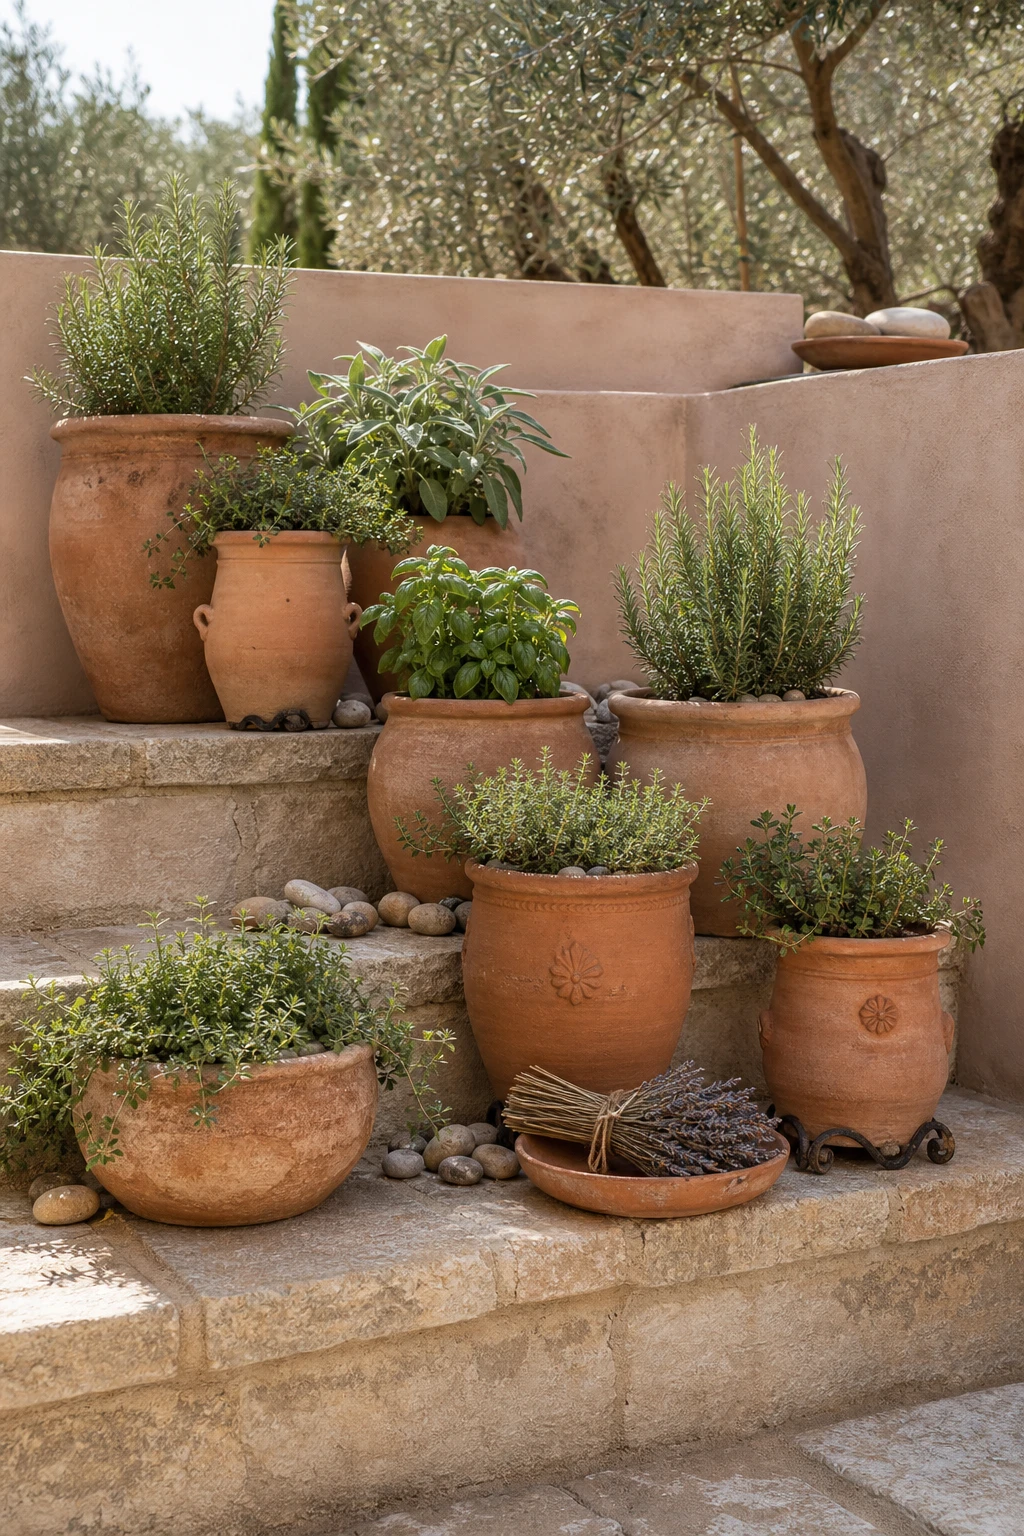
A Terracotta Herb Garden on a Sunny Step Is the Most Useful Thing You Can Plant
A step by step herb display is one of those ideas that earns its place every single day, and what I love most is how effortlessly it bridges the gap between the kitchen and the garden. You get the warm, earthy tones of handthrown pots stacked at different heights, the soft silver green of sage sitting next to bright basil, and the whole thing smells incredible when the sun hits it. Practicality and beauty land in the same spot without any compromise.
The Key Details
Handthrown terracotta herb pots
Worn limestone steps
River pebble top dressing
Terracotta saucer with dried lavender bundle
Aged iron pot feet
Pro TipGroup thirsty herbs like basil and parsley together on one step and drought tolerant ones like thyme, rosemary and sage on another, so each watering round matches what the plants actually need.
AvoidPlanting mint alongside other herbs in a shared pot almost always ends the same way: the mint runs wild, crowds everything else out, and you lose the whole display within a season.
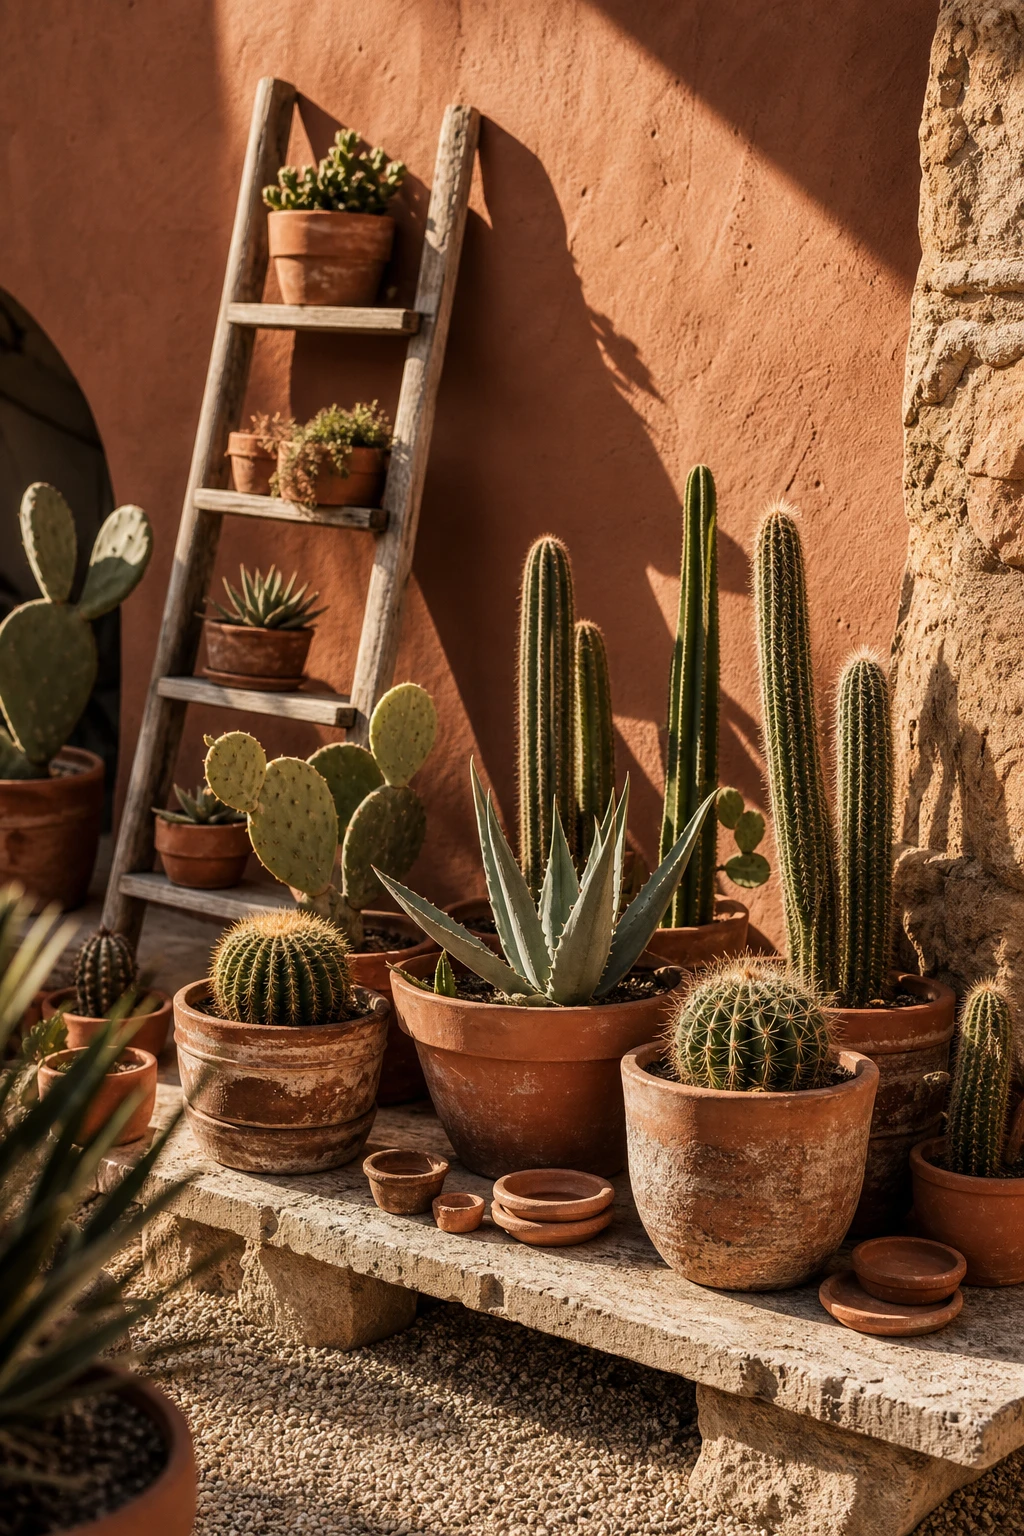
Cacti in Terracotta Pots Look Effortlessly Sculptural and Practically Look After Themselves
Cacti and terracotta are, quite simply, made for each other, and the pairing wins me over every time. Both are born from dry, sun baked landscapes, so the visual logic is already doing half the work before a single pot is placed. You get natural texture against natural texture, spines and ridges echoing the rough clay walls, and the whole thing reads as effortlessly sculptural rather than arranged. The best part is that the plant and the pot share the same low fuss philosophy.
The Key Details
Aged unglazed terracotta pots
Weathered stone display shelf
Sun bleached wooden ladder stand
Silver gravel mulch ground cover
Mixed sculptural cacti specimens
Pro TipPress a thin layer of fine grit around the base of each cactus once it is potted, so moisture drains away from the stem quickly and rot never gets a foothold.
AvoidPlanting cacti into a pot with no drainage hole traps water at the roots and the plant will rot quietly from the base up, which is a different fate from most plants but just as final.
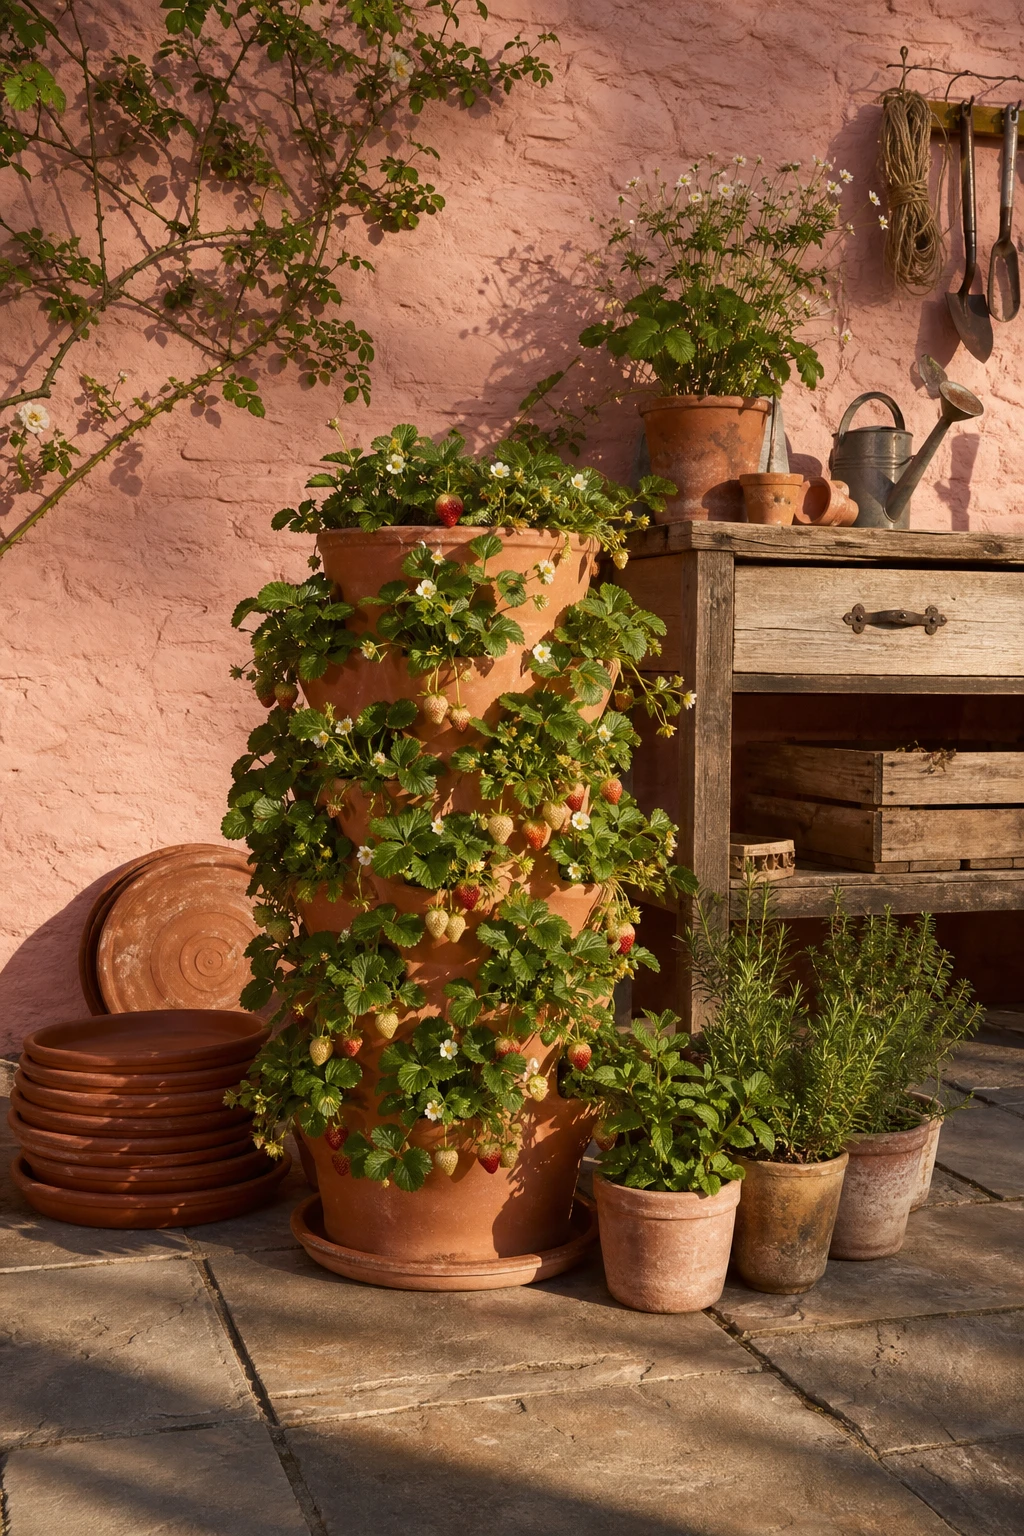
A Terracotta Strawberry Planter Is One of Those Pieces That Looks Good Even Before It Fruits
A strawberry tower earns its place on the potting bench long before the first fruit appears, and that sculptural stacked silhouette is what wins me over every time. The pockets break up the surface so your eye travels upward, giving you vertical interest without a trellis or frame. What I love is how the warm clay body reads as part of the terracotta family around it, tying straight into saucers, herb pots and flag paving rather than sitting apart, and then the fruit arrives and the whole thing becomes genuinely useful too.
The Key Details
Stacked strawberry tower pot with planting pockets
Weathered stone garden wall
Worn timber potting bench
Clustered terracotta saucers and herb pots
Aged limestone flag paving
Pro TipPour water in slowly from the top and pause twice as you go, giving it time to soak through each pocket before adding more.
AvoidPlanting more than one runner per pocket crowds the roots and the plants compete rather than fruit, so you end up with lush leaves and almost nothing to pick.
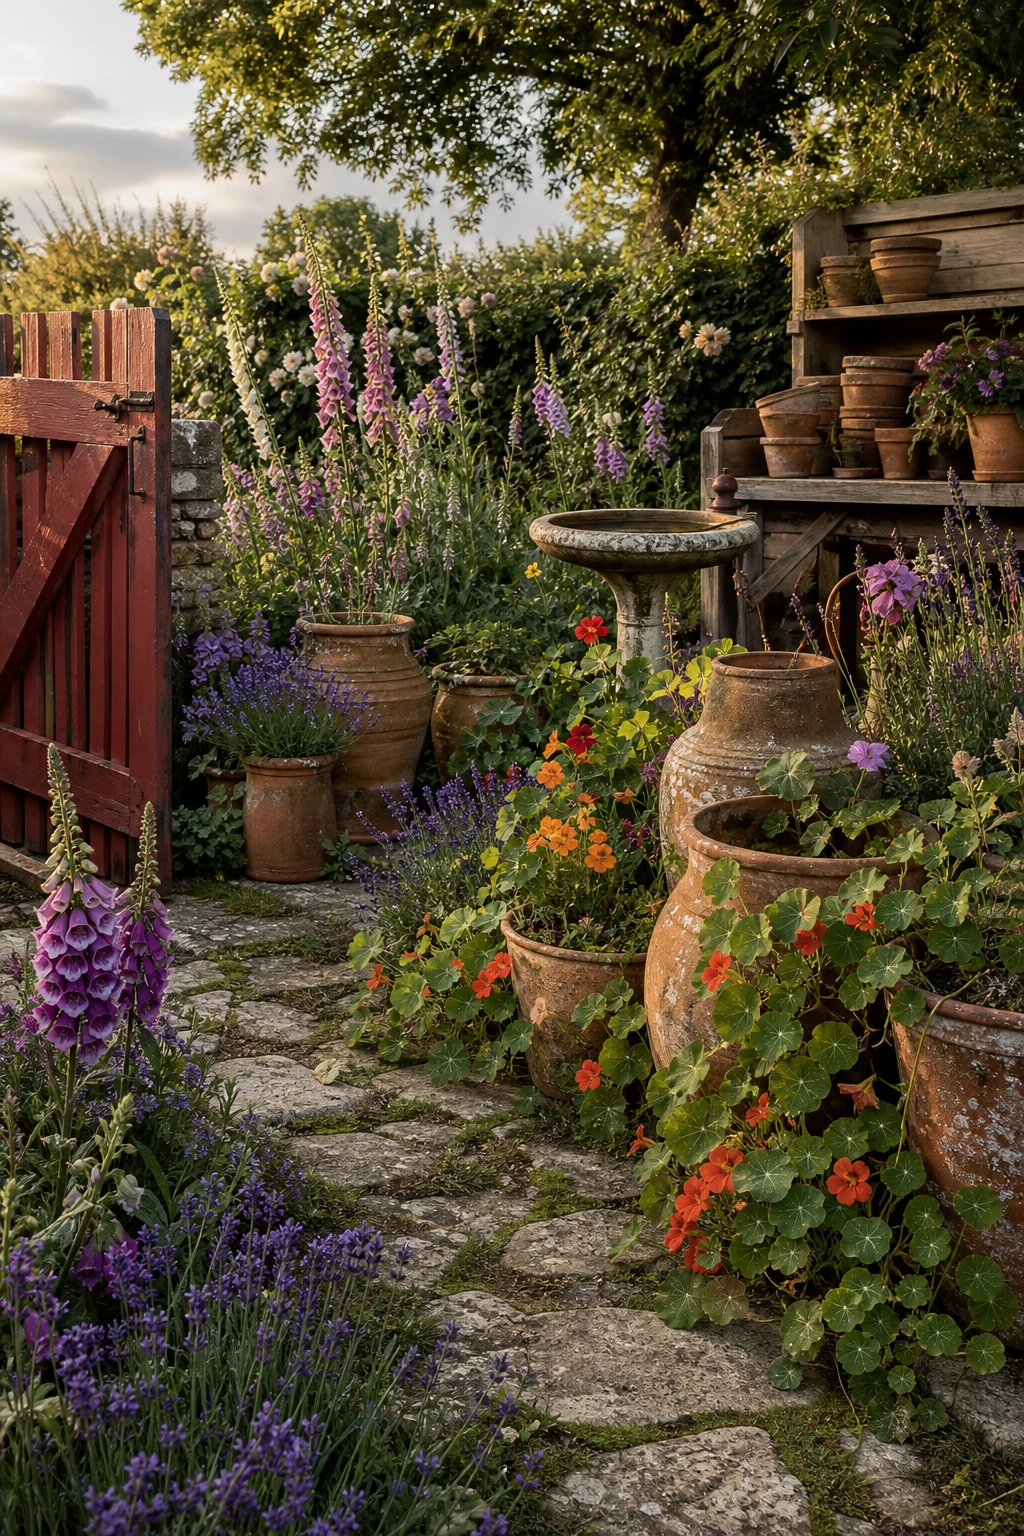
Terracotta Sits Right at the Heart of a Cottage Garden and Here Is Why It Works
Cottage gardens live and breathe by their sense of happy accident, and terracotta earns its place here because it never competes. What I love is how an aged unglazed pot simply melts into a tumble of foxgloves and nasturtiums, looking as though it has been there for decades. You get that feeling of abundance without anything feeling staged, and that quiet blending is exactly the magic I always chase in this style.
The Key Details
Aged unglazed terracotta pots in varied heights
Mossy limestone garden path
Lichen covered ceramic birdbath
Rustic timber potting bench
Cottage planting of lavender foxglove and nasturtium
Pro TipTuck a few pots directly into a patch of self seeding flowers so the containers appear to have been swallowed by the planting rather than placed beside it.
AvoidDeadheading and tidying every stem too promptly strips away the soft overflow that gives a cottage garden its soul.
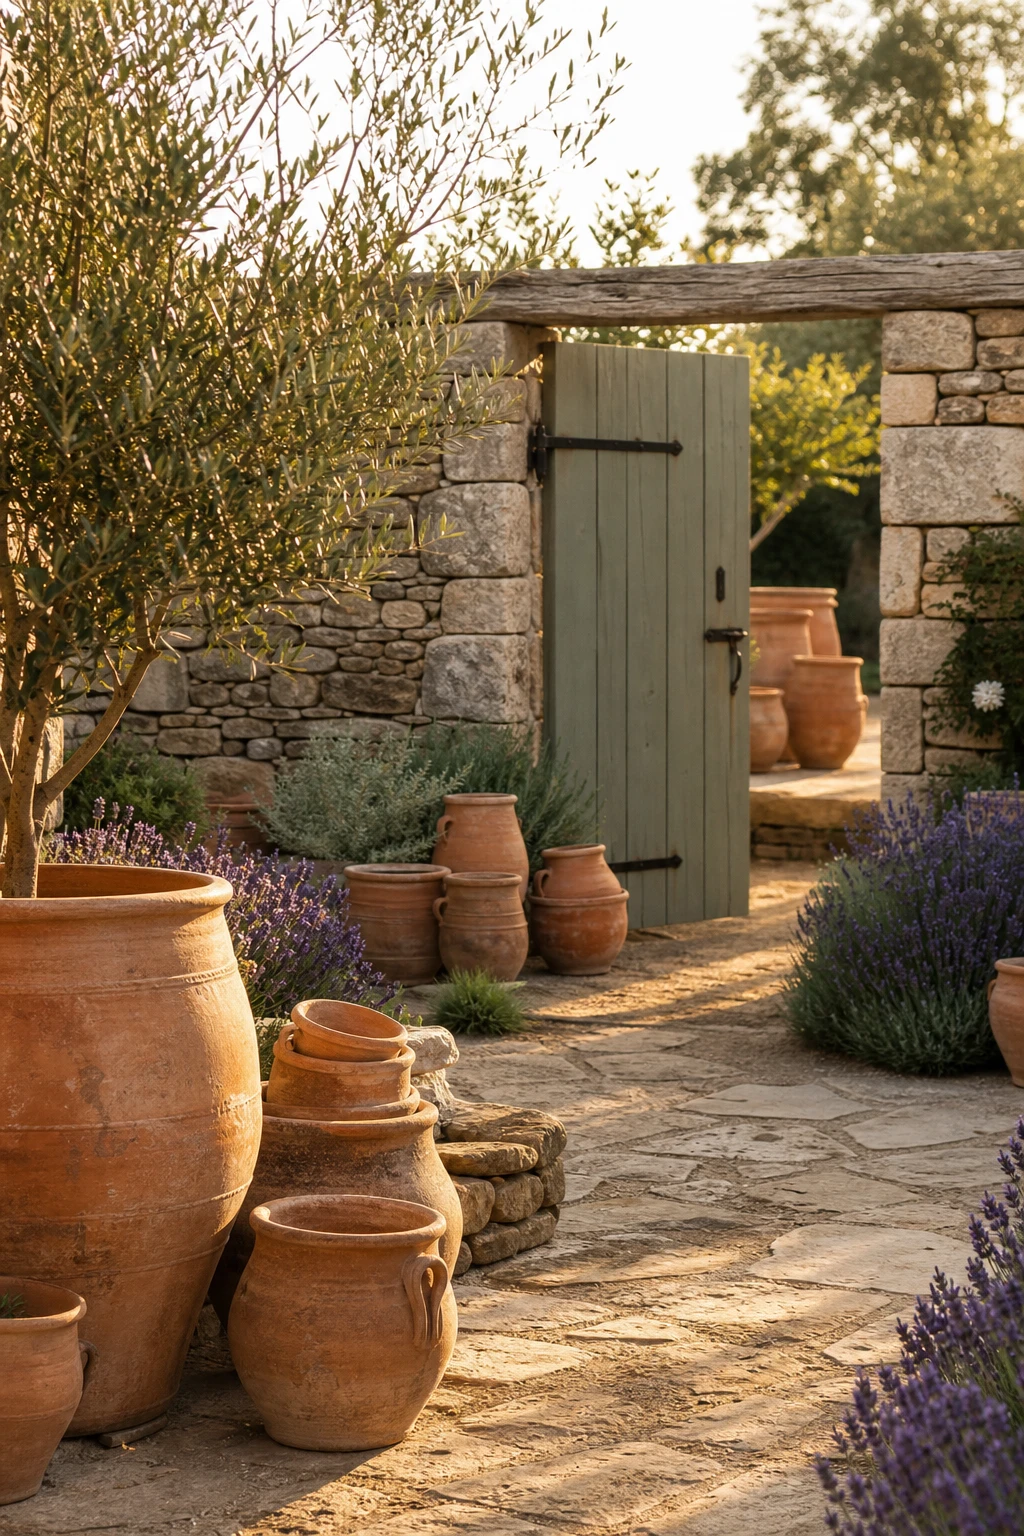
The French Country Garden Look Comes Down to One Simple Material Used Repeatedly
Repeating one material across a whole garden is something I come back to again and again, and terracotta does this better than almost anything else. You get a sense of calm that no amount of styling can fake, because the eye has nothing to fight over. Watch how the same warm, dusty clay tone pulls clustered pots, a courtyard path, and a crumbling stone wall into one quiet conversation, and suddenly the space feels like it has always been there.
The Key Details
Clustered terracotta pots in graduating sizes
Worn limestone courtyard path
Clipped lavender border planting
Weathered dry stacked stone wall
Aged oak and iron garden gate
Pro TipFlank your front door with a pair of matching aged terracotta pots, the same size and the same finish, and you get that effortless French symmetry without touching anything else.
AvoidDropping in a glazed ceramic or a painted fibreglass pot among your terracotta instantly breaks the calm the whole look depends on, and the eye goes straight to the odd one out.
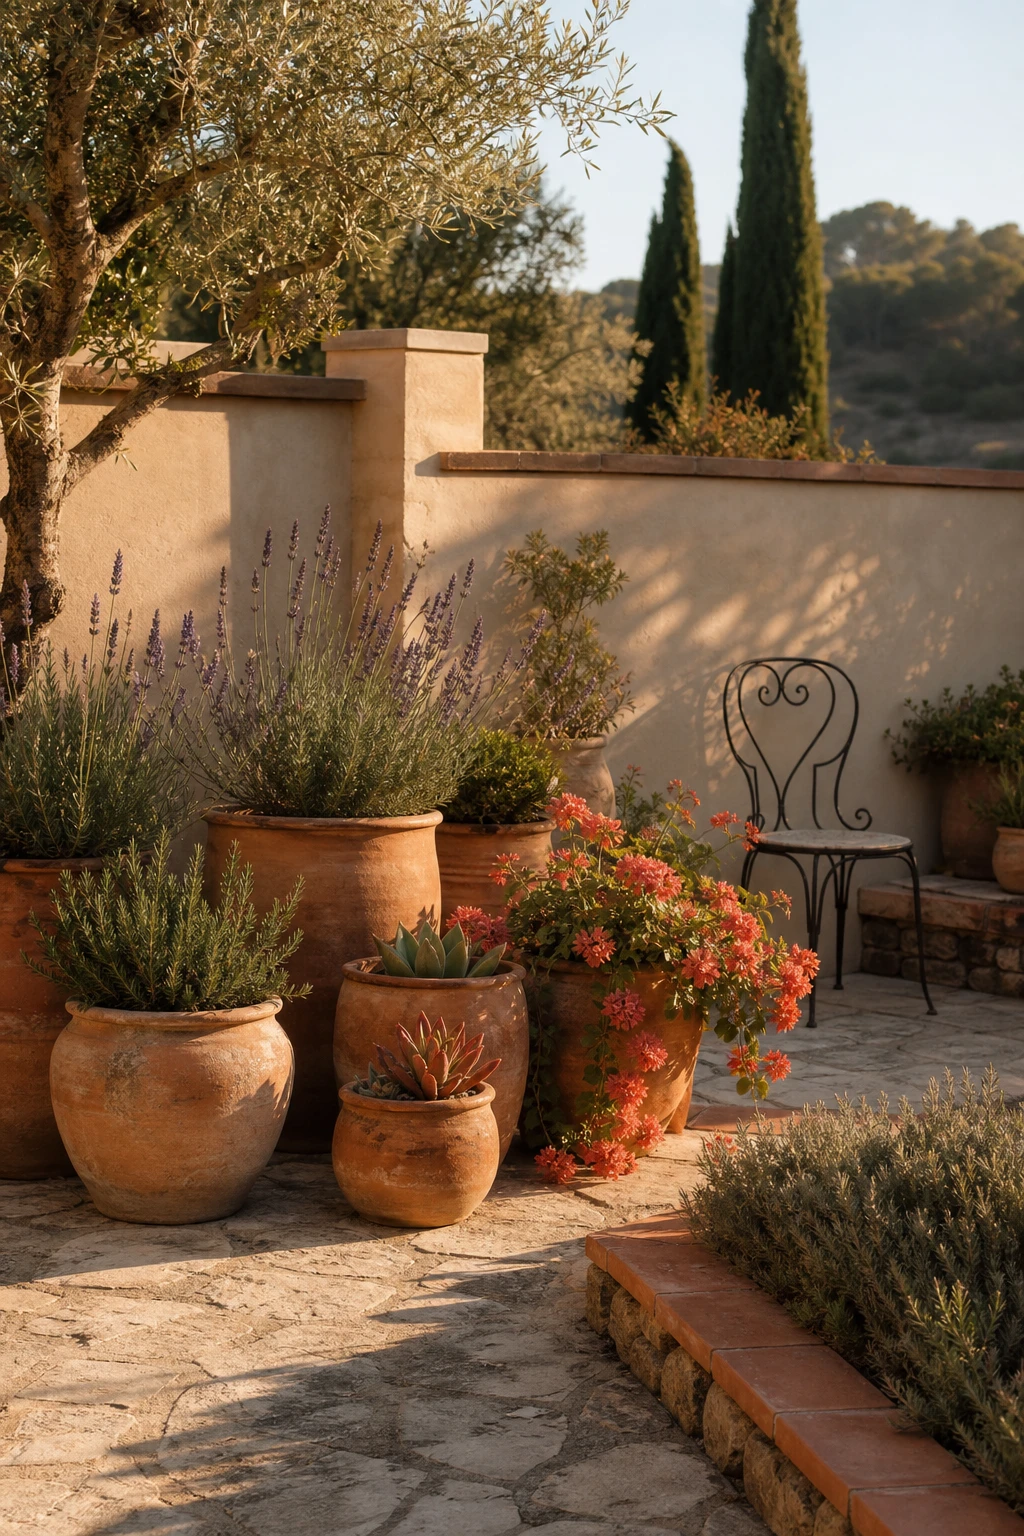
A Mediterranean Pots Garden Feels Warm and Generous and Is Easier to Recreate Than You Think
Clustered pots at different heights are what give a Mediterranean garden its generous, tumbling energy, and what I love is how little space you actually need to pull it off. You get that sun baked hillside feeling the moment you mix aged terracotta with heat loving plants like lavender, agave, and trailing rosemary. Watch how the earthy tones of the pots and the warm stone underfoot all pull in the same direction, building a mood that feels effortless rather than arranged.
The Key Details
Clustered aged terracotta pots in varied heights
Irregular limestone paving
Wrought iron bistro chair
Terracotta tiled low garden step
Rendered garden wall
Pro TipStack a few flat terracotta tiles or reclaimed bricks beneath the shorter pots so every vessel sits at a slightly different level, giving your cluster that casual, grown over time look.
AvoidPlanting moisture lovers like ferns or hydrangeas in this scheme pulls the whole mood apart, because the lush softness fights the sun baked dryness you are trying to build.
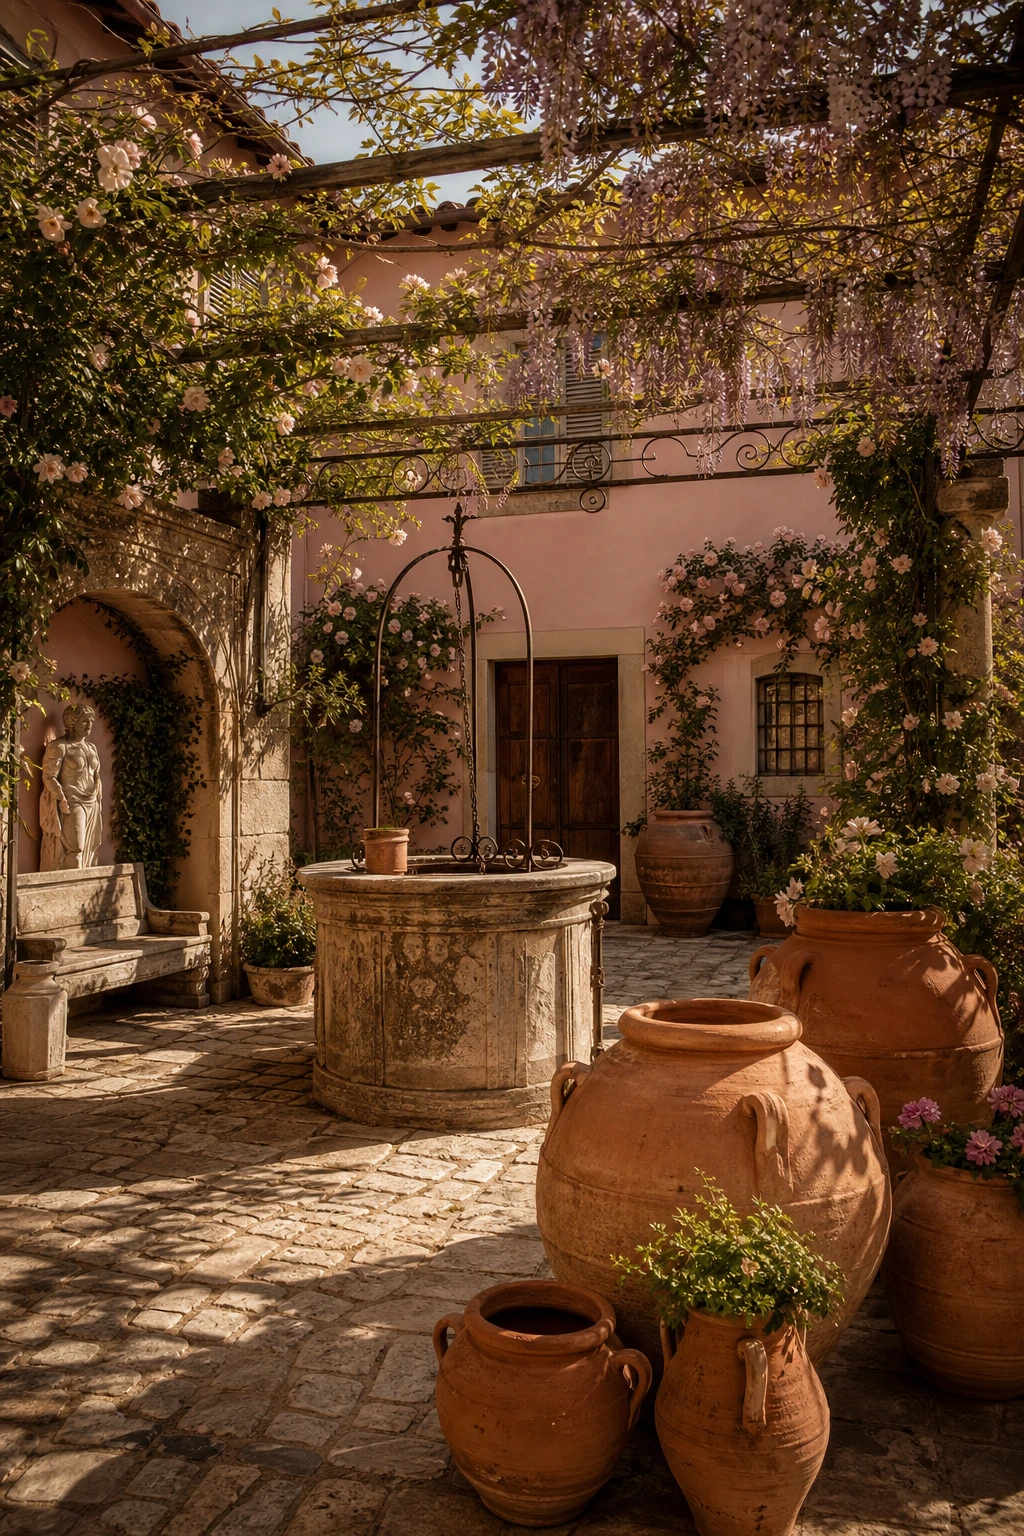
How a Tuscan Courtyard Garden Uses Stone and Terracotta to Feel Both Grand and Welcoming
Tuscan courtyards win me over because they understand that grandeur and warmth are not opposites. Oversized urns and amphoras anchor the space with real visual weight, yet the rough cobblestones and carved stone bench keep everything grounded and human. What I love most is how generous pot sizing does the heavy lifting: a tall terracotta vessel beside a limestone wellhead reads as architecture, not decoration, and you get that sense of arriving somewhere without the courtyard ever feeling cold.
The Key Details
Oversized hand thrown terracotta urns and amphoras
Weathered limestone wellhead
Wrought iron pergola with climbing roses and wisteria
Rough hewn cobblestone courtyard paving
Carved stone alcove bench
Pro TipStand a pair of lemon trees in tall terracotta pots either side of your main entrance and they act as living columns, framing the threshold and giving the courtyard an instant sense of ceremony.
AvoidFilling every corner with pots and planting steals the quiet pause that makes a Tuscan courtyard feel so generous, leaving you with a space that reads as busy rather than grand.
Spanish Style Gardens Layer Bold Colour with Terracotta in a Way That Feels Alive
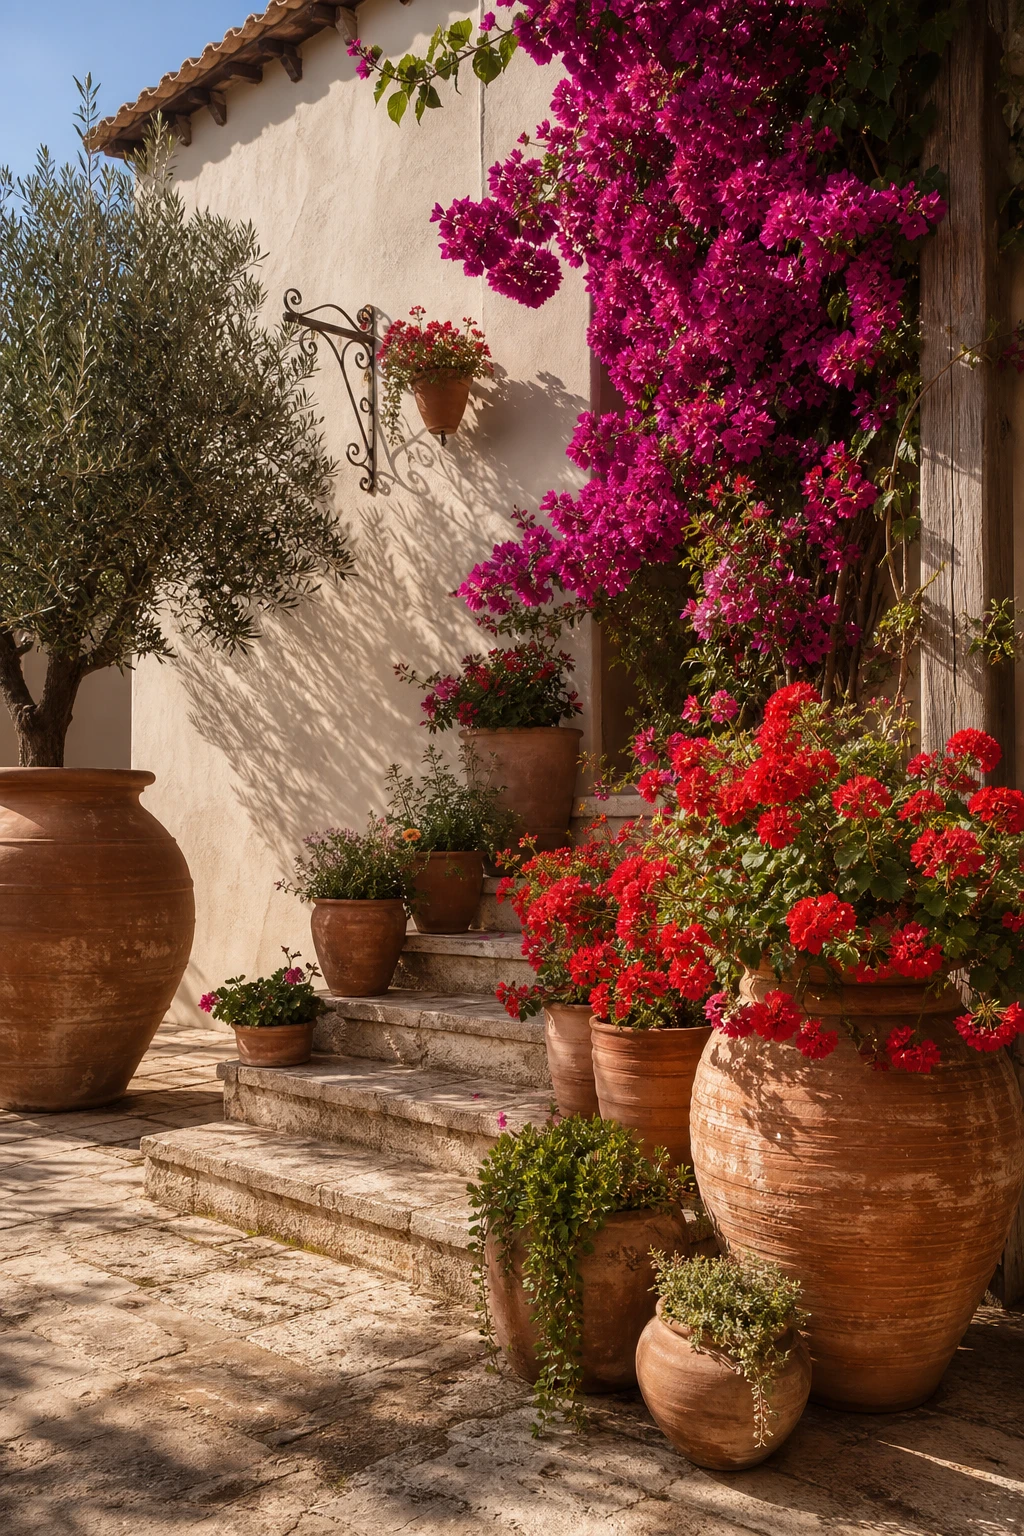
Spanish garden drama is built on one gorgeous tension: the hot pinks and reds of bougainvillea and geraniums punching against the cool, dusty warmth of terracotta. What I love is how the earthy clay tones stop those vivid flowers from ever feeling garish, grounding them so the whole display feels rich rather than loud. You get depth by massing pots at different heights, so the eye travels and the garden breathes. That contrast between rough handmade clay and extravagant bloom is what makes this style feel so alive.
The Key Details
Massed handmade terracotta pots at varied heights
Trailing bougainvillea and geranium plantings
Aged limestone step pavers
Wrought iron wall bracket
Clipped olive tree in oversized terracotta urn
Pro TipPaint the wall behind your pot display in a warm white, such as a limewash or chalky finish, and watch the terracotta glow against it in a way it simply cannot against bare brick or grey render.
AvoidMixing too many flower colours across your pots pulls the eye in every direction at once and the display loses all its punch, so pick one or two vivid shades and repeat them confidently.
A Gravel Garden with Terracotta Pots Is the Low Maintenance Look That Always Looks Intentional
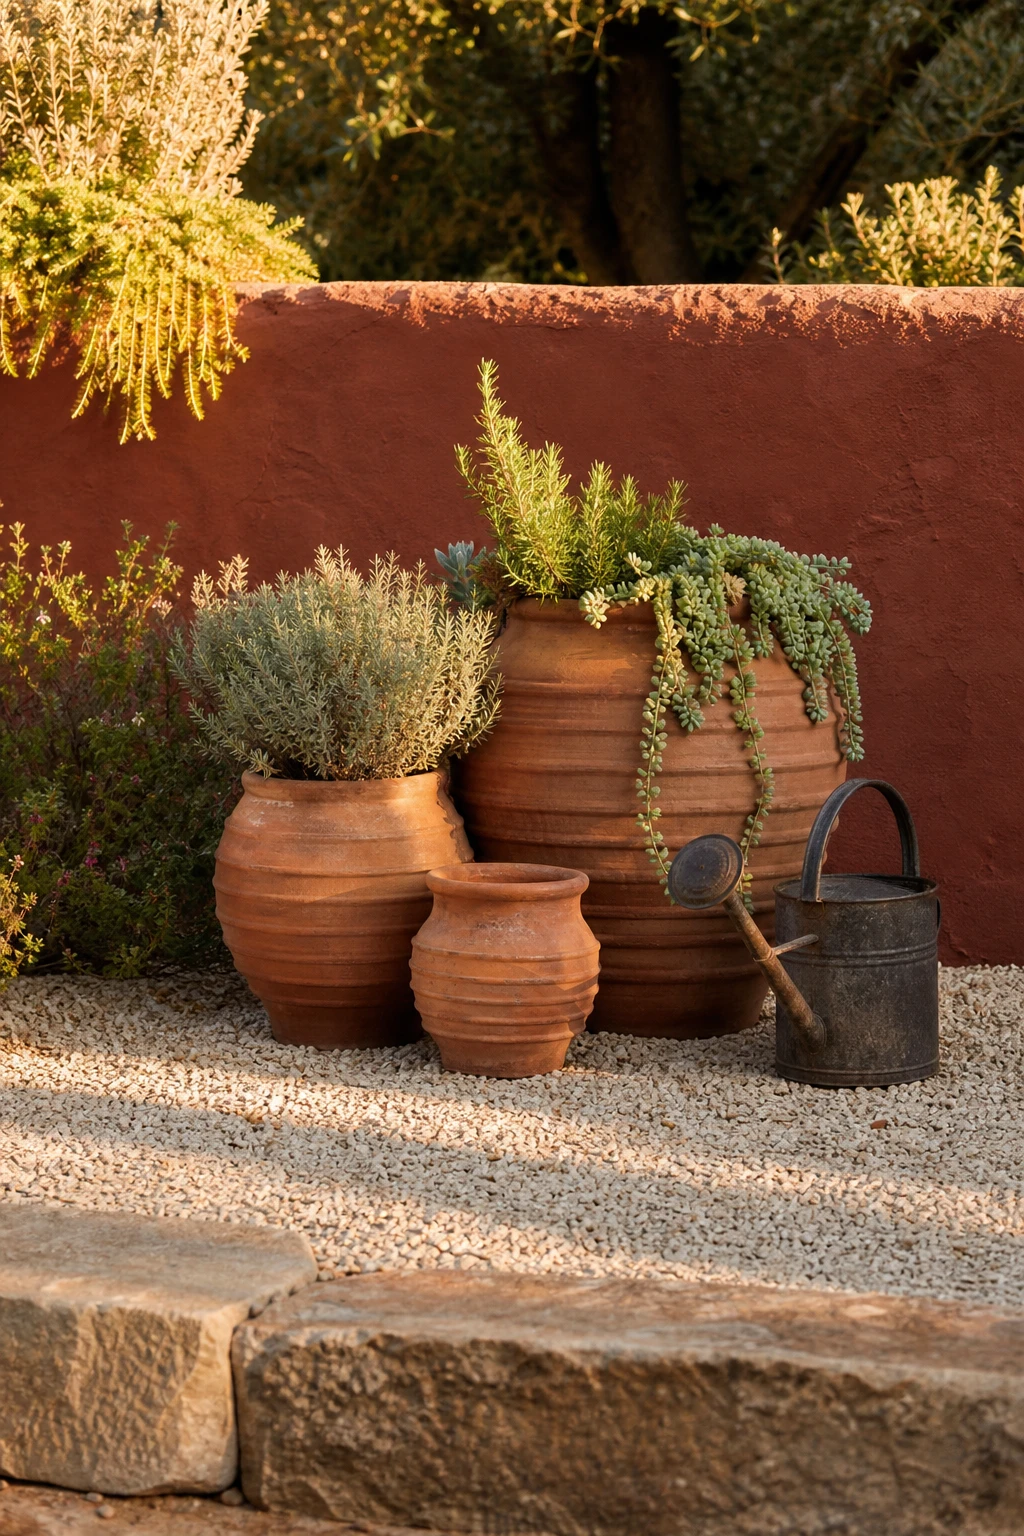
Gravel is the quiet hero of this combination, and what I love most is how it pulls a loose scattering of pots into something that reads as entirely deliberate. You get a pale, consistent base that lets the warm terracotta hold centre stage without competition. The texture contrast between rough stone and smooth clay does all the heavy lifting, so even a simple herb pot beside a trailing succulent looks considered rather than accidental, and the whole scheme asks almost nothing of you to maintain.
The Key Details
Handthrown terracotta pots in varied sizes
Raked pale limestone gravel ground
Low rough rendered garden wall
Aged iron watering can
Trailing succulents and potted herbs
Pro TipLay a sheet of landscape fabric before you spread your gravel and you will never spend a weekend pulling weeds from between the stones.
AvoidFine pea gravel seems like a practical choice until every person who walks through the garden brings half of it indoors on their shoes.
An Italian Rooftop Terrace Shows How Terracotta Turns a Plain Flat Space Into Something Dreamlike
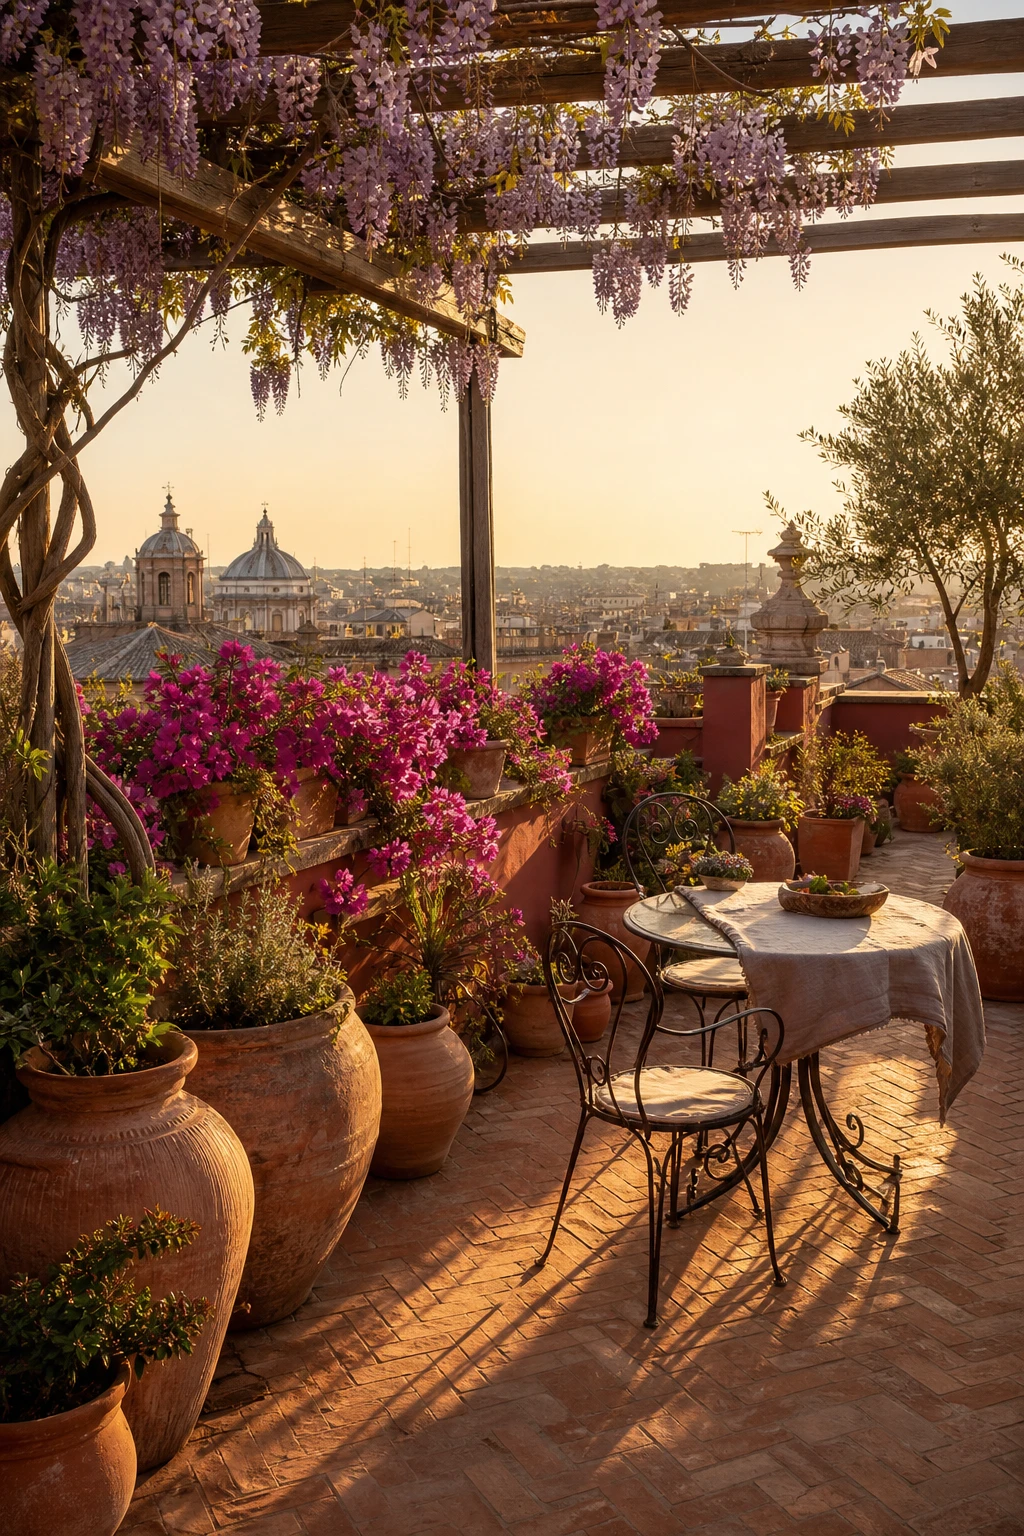
Rooftops have this raw, open quality that terracotta just takes hold of and turns into something cinematic. What I love about graduating pot heights is the way your eye moves up and down across the space, so a flat concrete slab suddenly reads as a composed scene rather than an afterthought. You get bougainvillea spilling over the parapet, wisteria threading through a timber pergola above, and the herringbone tile floor tying it all together, and it feels genuinely Italian without a single forced detail.
The Key Details
Handthrown terracotta pots in graduating heights
Herringbone terracotta tile flooring
Wrought iron bistro table and chairs
Timber slatted pergola with trailing wisteria
Bougainvillea cascading over parapet wall
Pro TipSpecify fibre clay planters rather than traditional terracotta because they weigh roughly half as much and most rooftop structures will thank you for it.
AvoidPlanting tall ornamental grasses or standard trained olives in shallow pots on an exposed terrace almost always ends in a toppled plant and a cracked pot the first time a gust comes through.
A Row of Old Teapots Planted Up Brings Rustic Warmth to a Garden Wall or Shelf
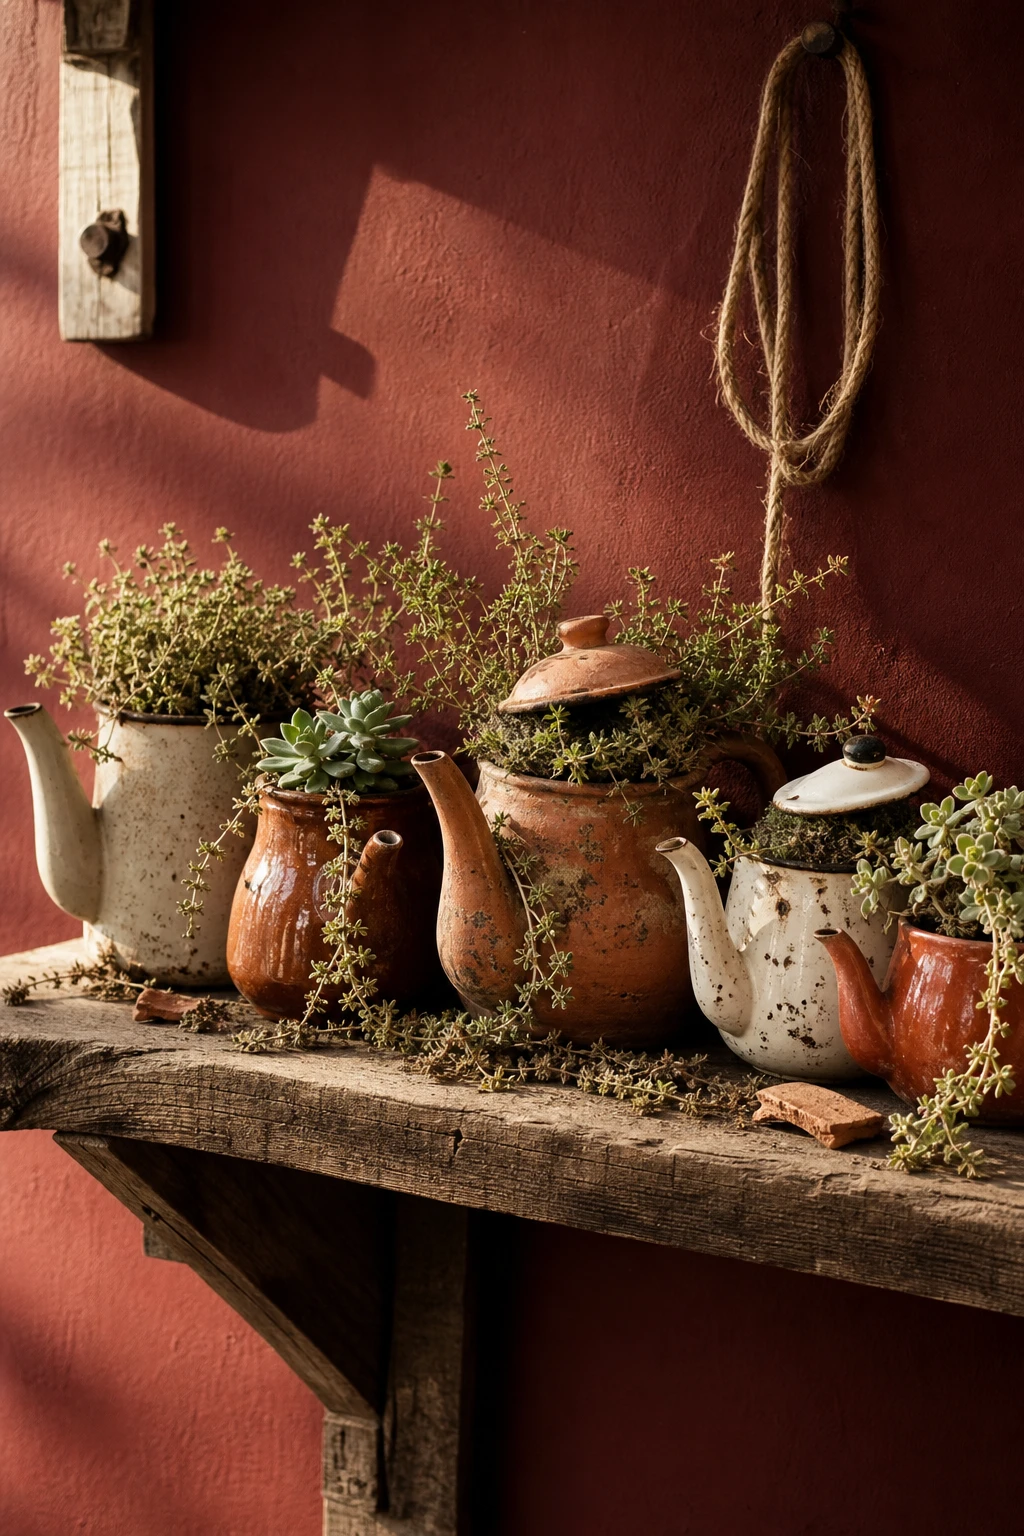
A row of old teapots lined up on a timber shelf is one of my favourite ways to bring quiet storytelling into a garden. You get that lovely sense that each piece has a life behind it, and the mismatched shapes and glazes create rhythm without feeling chaotic. What wins me over every time is how the spouts and handles give the display a personality that a standard pot simply cannot match.
The Key Details
Mismatched vintage teapot planters
Weathered rough sawn timber shelf
Trailing thyme and succulent planting
Wrought iron nail hooks
Knotted jute hanging loop
Pro TipBefore you fill a teapot with compost, drill one small drainage hole in the base so roots never sit in water and rot the planting out.
AvoidMixing in too many unrelated objects at once turns a charming display into a jumble that loses all its warmth and makes the eye dart around without settling.
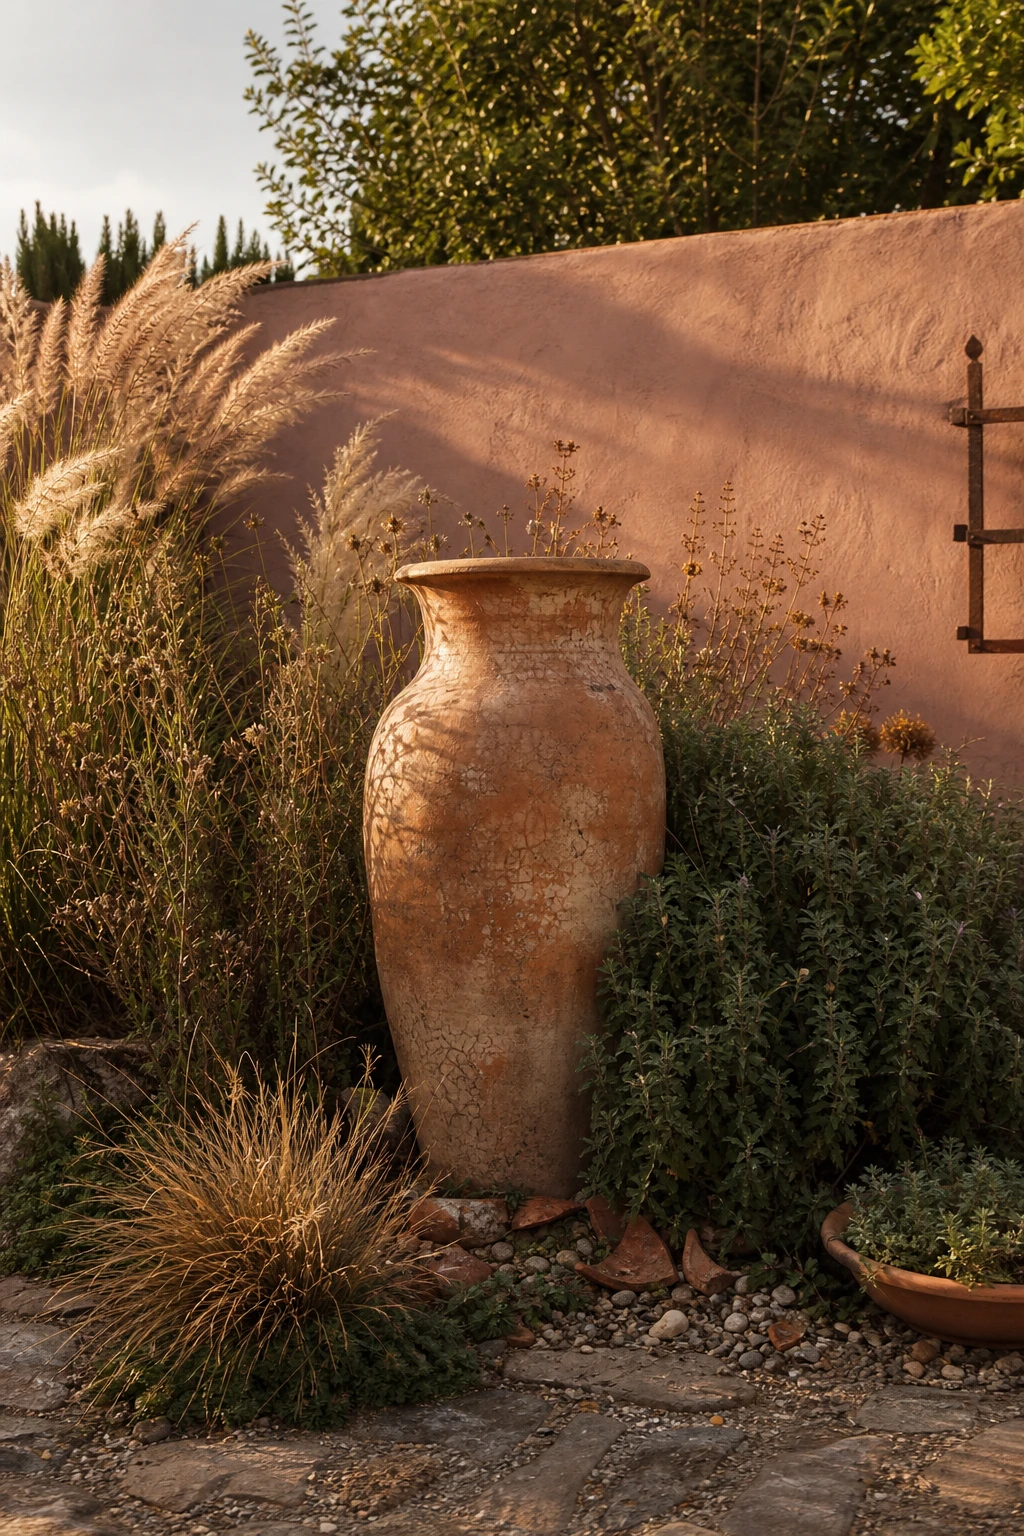
A Rustic Ceramic Vase Placed in a Border Adds Something a Pot of Flowers Simply Cannot
Placing a ceramic vase inside a planted border rather than on a hard surface is one of those moves that completely changes how a garden reads. What I love is the way it stops being an object and starts behaving like sculpture, something with presence and stillness among all the movement of foliage. You get a focal point that holds its ground through every season, long after the flowers have come and gone.
The Key Details
Weathered ceramic sculptural vase
Ornamental grass planting
River pebble and shard mulch
Low lime rendered garden wall
Dried seedhead border planting
Pro TipNestle the base of the vase into low groundcover so the soil and planting seem to rise around it, giving the piece the look of something that has always belonged there.
AvoidPlacing a decorative vase anywhere near a path or lawn edge means one misplaced step will knock it over and very likely crack it.
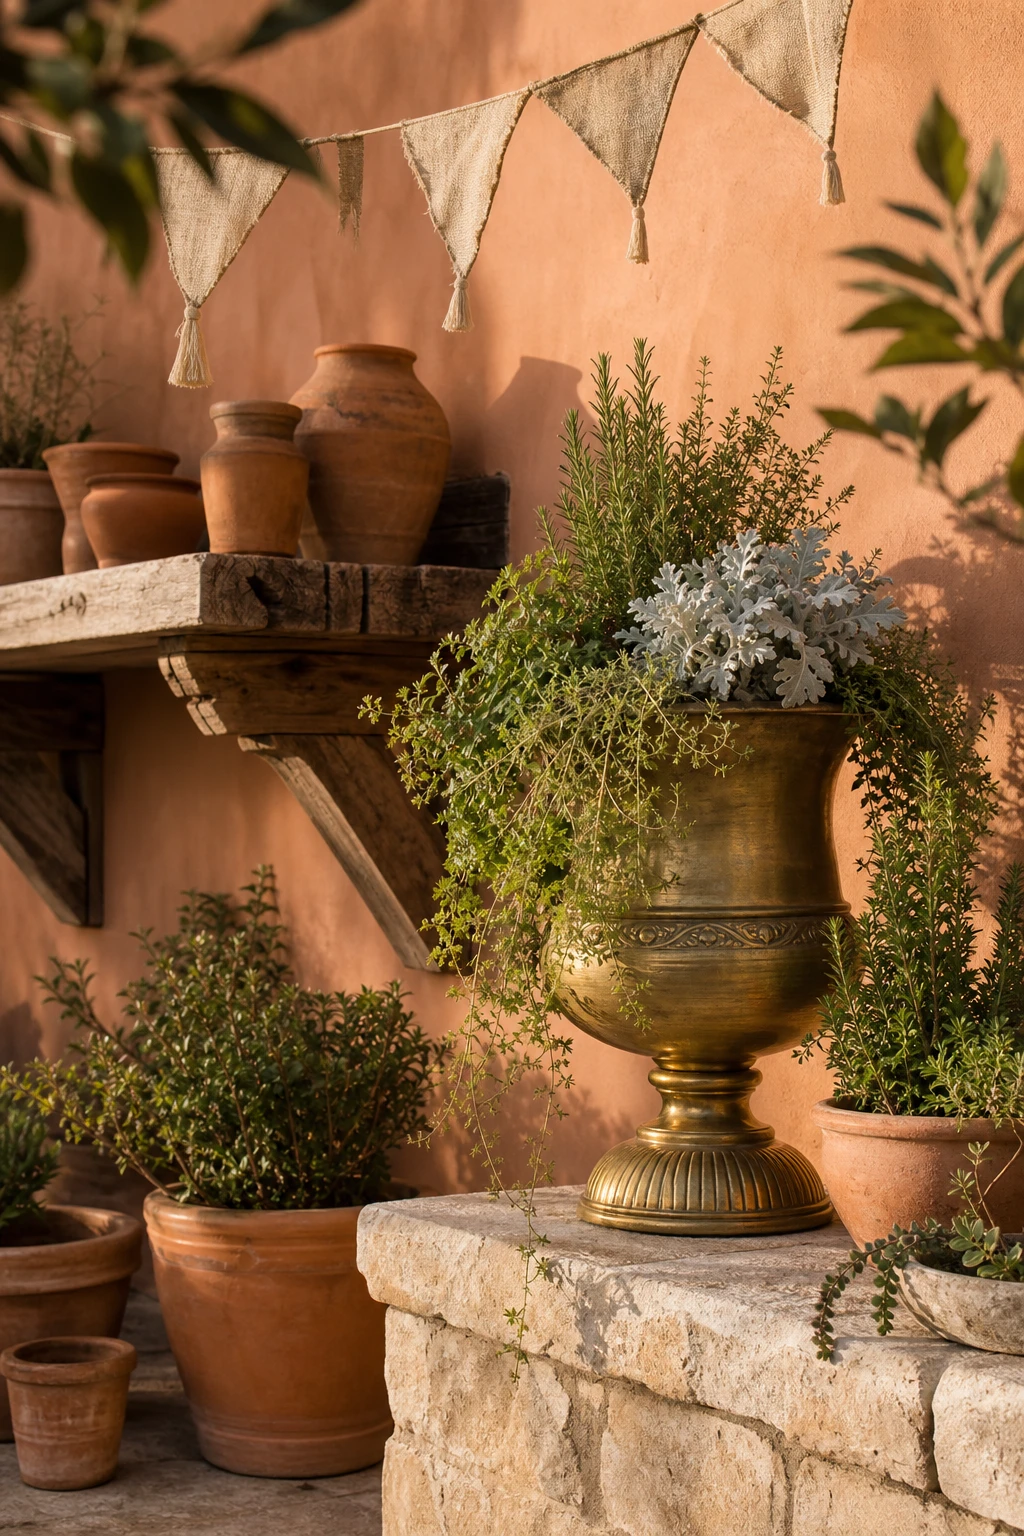
Antique Brass Planters Alongside Terracotta Add the Warmest Kind of Contrast
Brass and terracotta share the same warm side of the colour wheel, so placing them together deepens the heat in a space rather than splitting it. What wins me over every time is how aged brass pulls the ochre and rust tones right out of the clay, and you get this quiet richness that cool metals like chrome or steel simply cannot touch. The worn surfaces talk to each other, and that conversation is the whole look.
The Key Details
Antique brass urn planter
Hand thrown graduated terracotta pots
Worn tumbled limestone ledge
Reclaimed timber shelf bracket
Trailing herbs and dusty miller planting
Pro TipLeave brass planters outside through a full season before styling them, so the patina develops on its own terms and beds in with the aged terracotta around it.
AvoidPolishing brass planters to a high shine strips away the very quality that makes the pairing work, and the result reads as formal and out of place in a rustic garden setting.
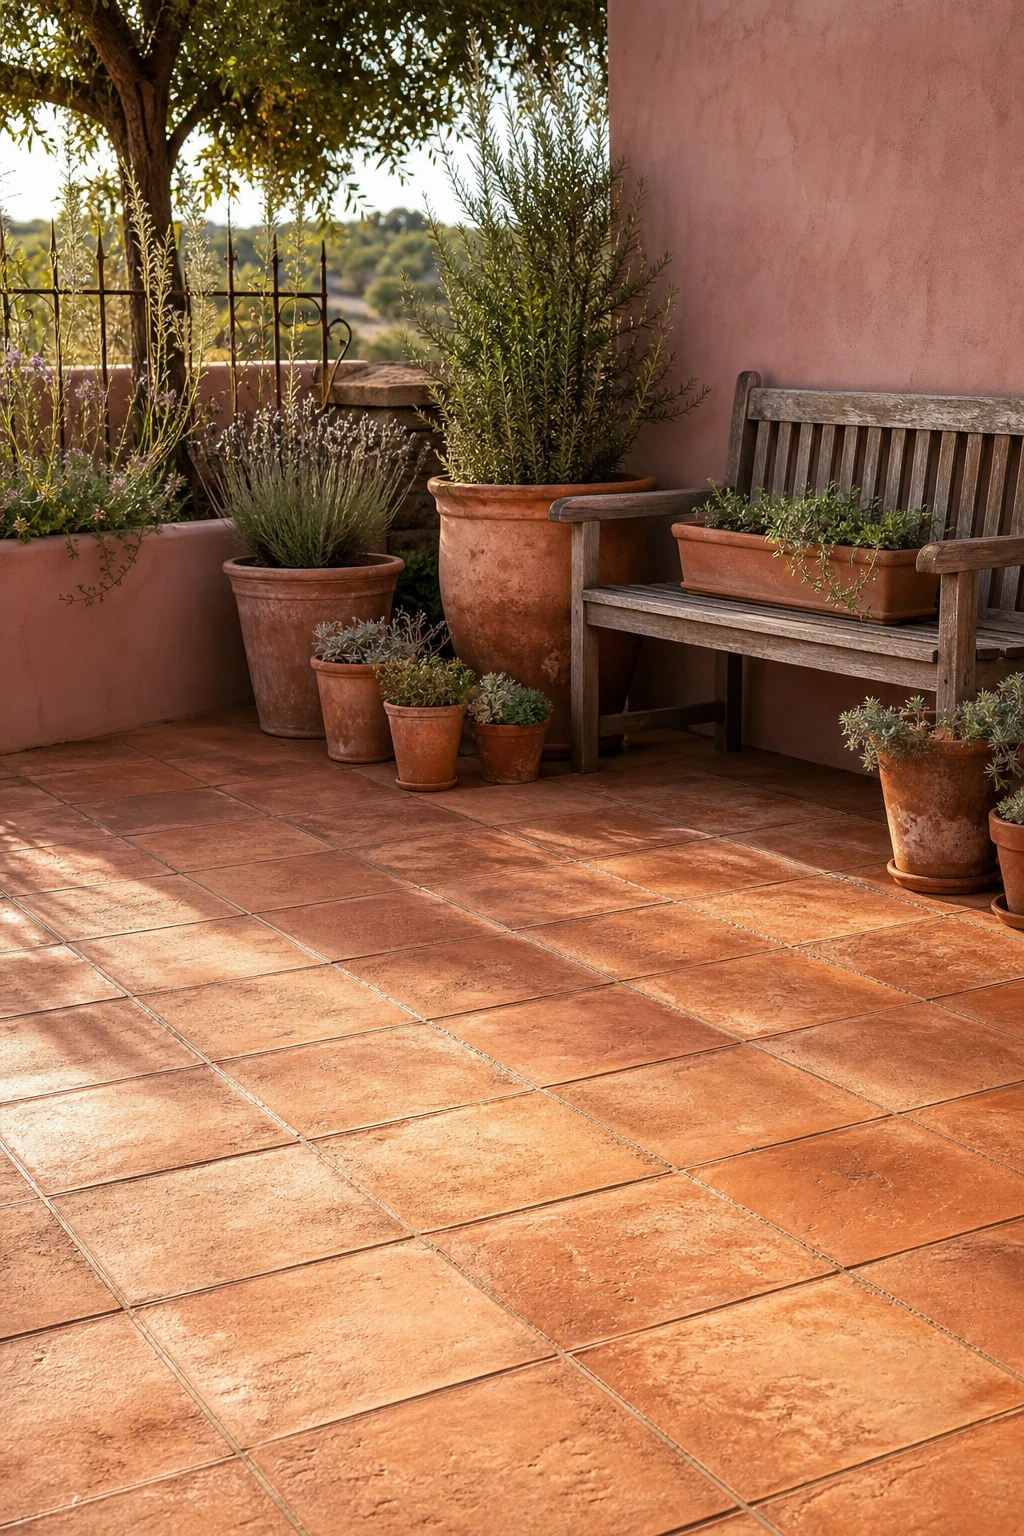
Terracotta Tiles on an Outdoor Floor Pull Every Pot and Plant Together Beneath Them
Laying terracotta tiles underfoot is one of my favourite moves in a garden because every pot, planter and plant you place on top suddenly belongs together. The floor does the unifying work so you get a cohesive, settled look without matching a single thing above ground level. Watch how the warm clay tones in the tiles pick up the colour already sitting in your pots and soil, and the whole space reads as one considered decision rather than a collection of separate pieces.
The Key Details
Handmade unglazed terracotta floor tiles
Aged clay pots in graduating sizes
Weathered timber slatted bench
Terracotta trough planter
Low lime render garden wall
Pro TipSeal outdoor terracotta tiles with a penetrating stone sealer before the first frost arrives, and repeat every two years to keep moisture from working into the clay.
AvoidSkipping the sealant in a wet climate lets the tiles absorb standing water, and when that water freezes it expands inside the clay and cracks the tile from within.
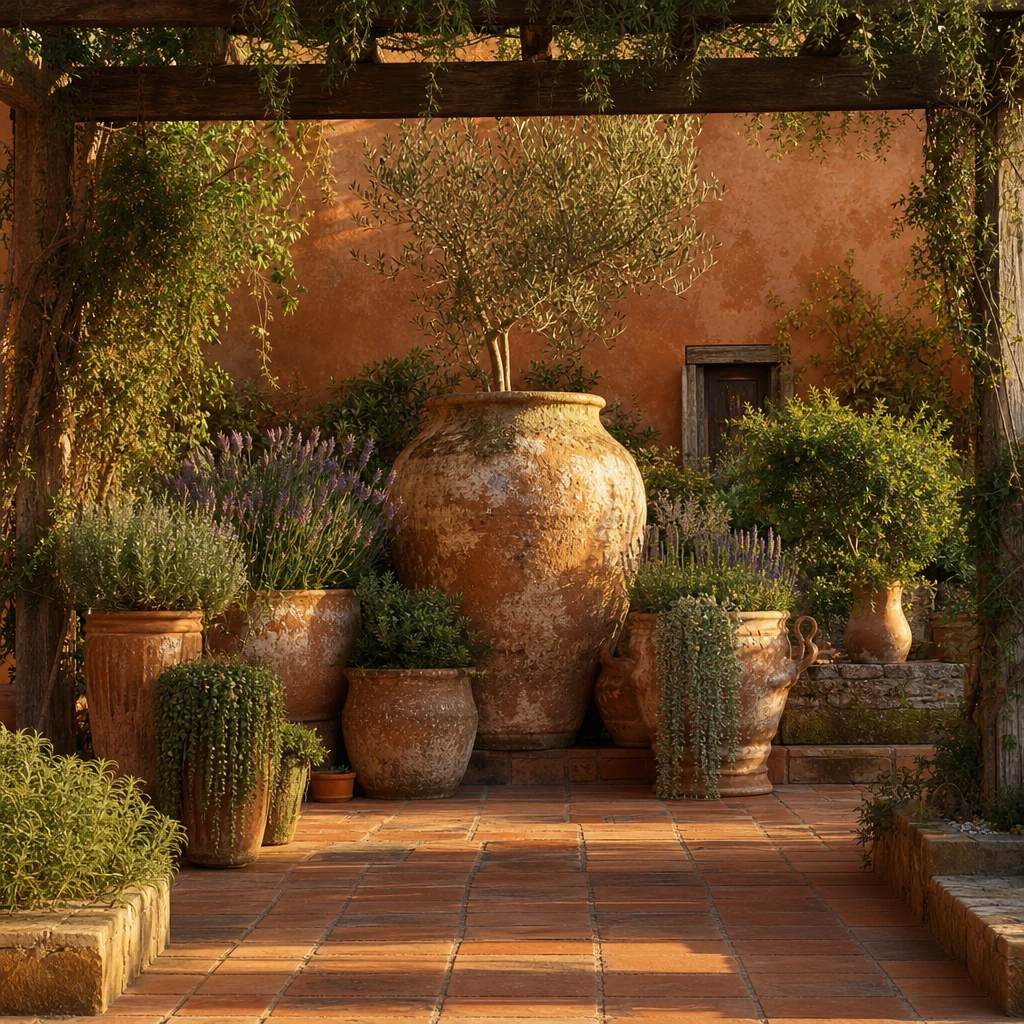
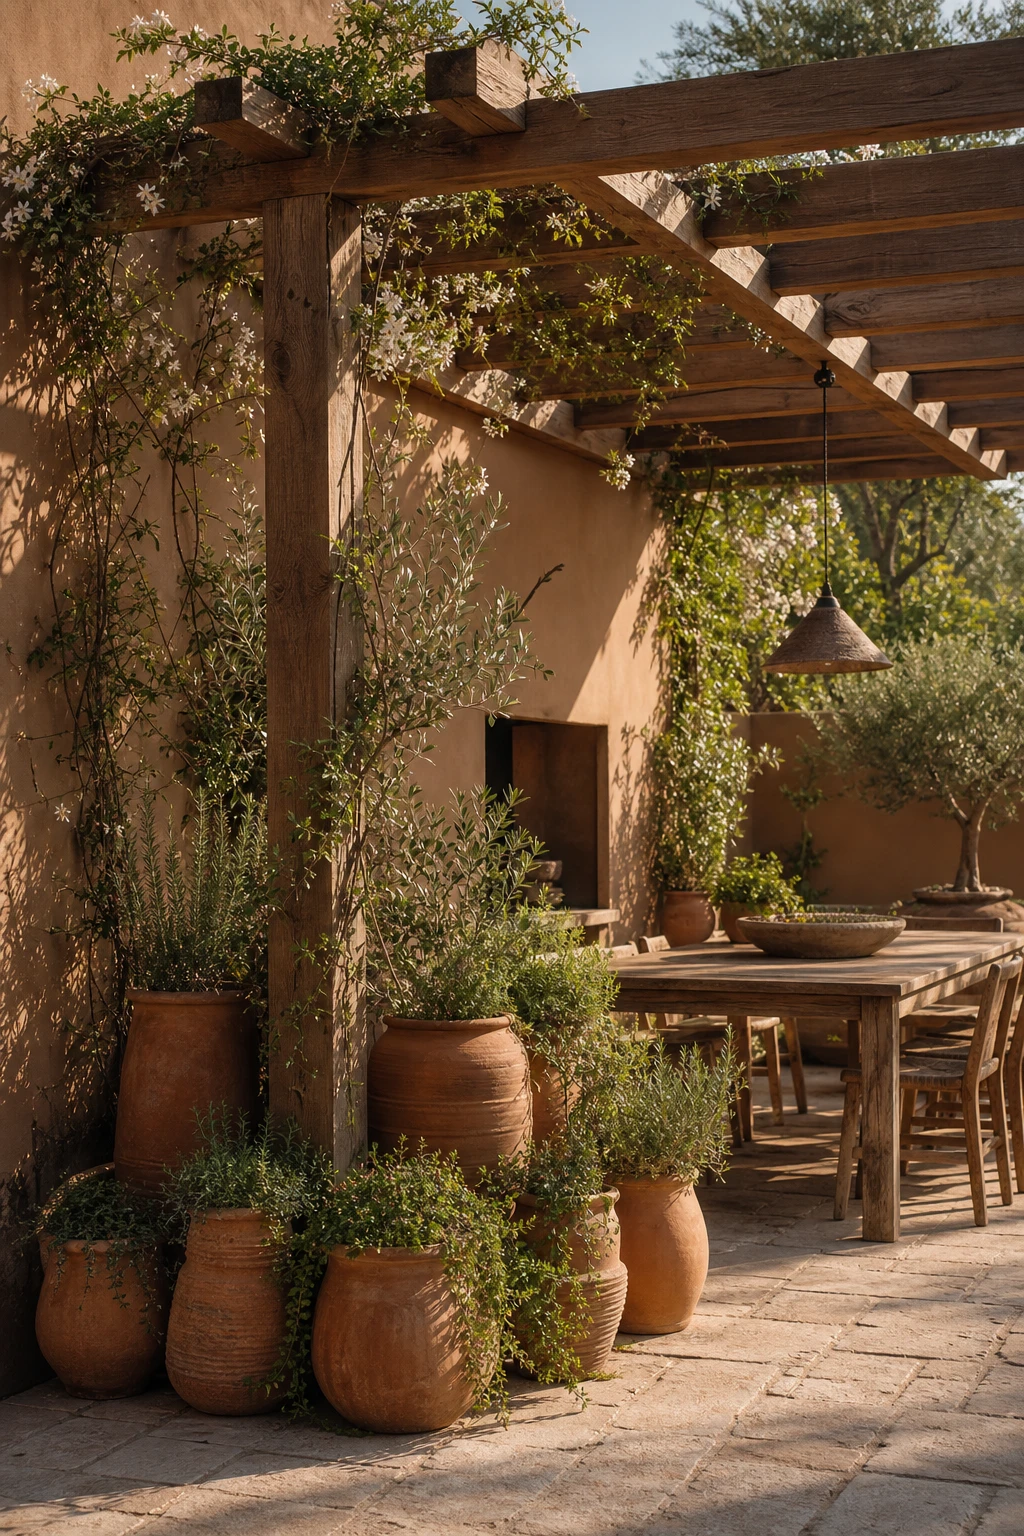
A Timber Pergola Gives Every Terracotta Pot Beneath It a Sense of Place and Shelter
A timber pergola does something a fence or a wall simply cannot: it gives the space above your pots a presence, so the whole display reads as a room rather than a collection. Those raw beams draw the eye upward, then let it settle back down onto the graduated terracotta below. You get that layered feeling where nothing looks accidental, and I find the warm clay tones against aged timber is one of the most honest, unfussy pairings in outdoor design, two materials that have always belonged together.
The Key Details
Raw timber pergola beams with open lattice roof
Grouped terracotta pots in graduated heights
Climbing jasmine wound around pergola uprights
Worn limestone paver flooring beneath the structure
Lime rendered garden wall as backdrop
Pro TipTrain jasmine up the uprights and let it thread across the roof so you get pools of dappled shade falling directly onto the pots below, which keeps terracotta cooler and the planting looking lush through summer.
AvoidPositioning a pergola without checking where the afternoon sun falls means your pot display can end up in deep shadow by 3pm, which flattens the colour of terracotta and leaves trailing plants reaching awkwardly toward the light.
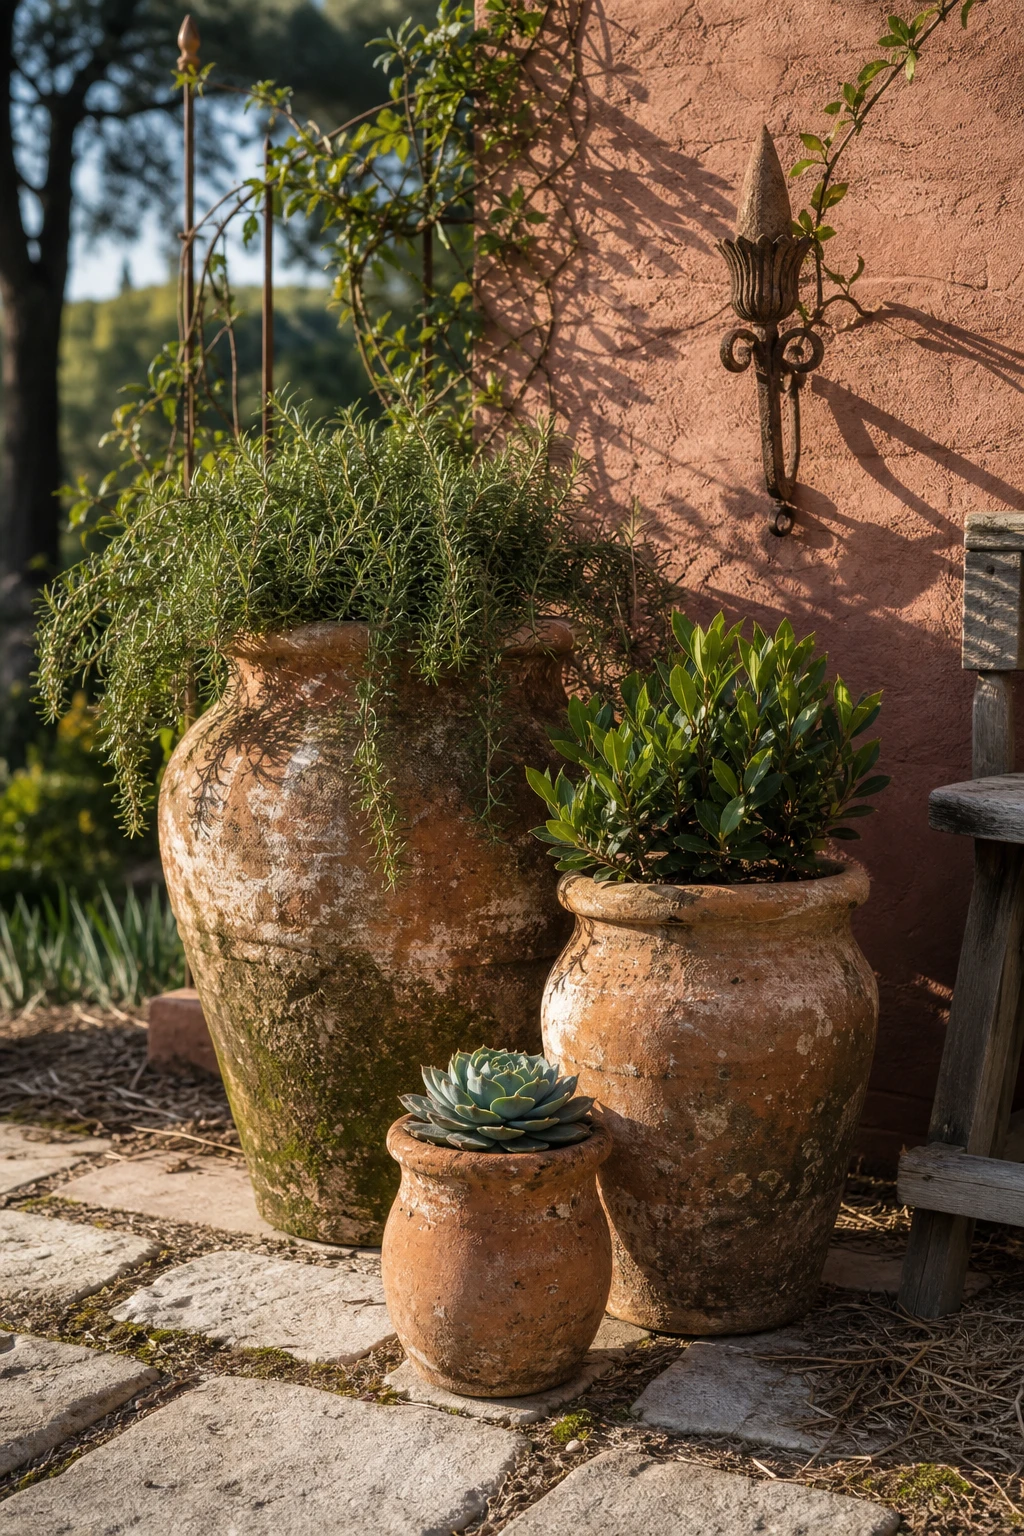
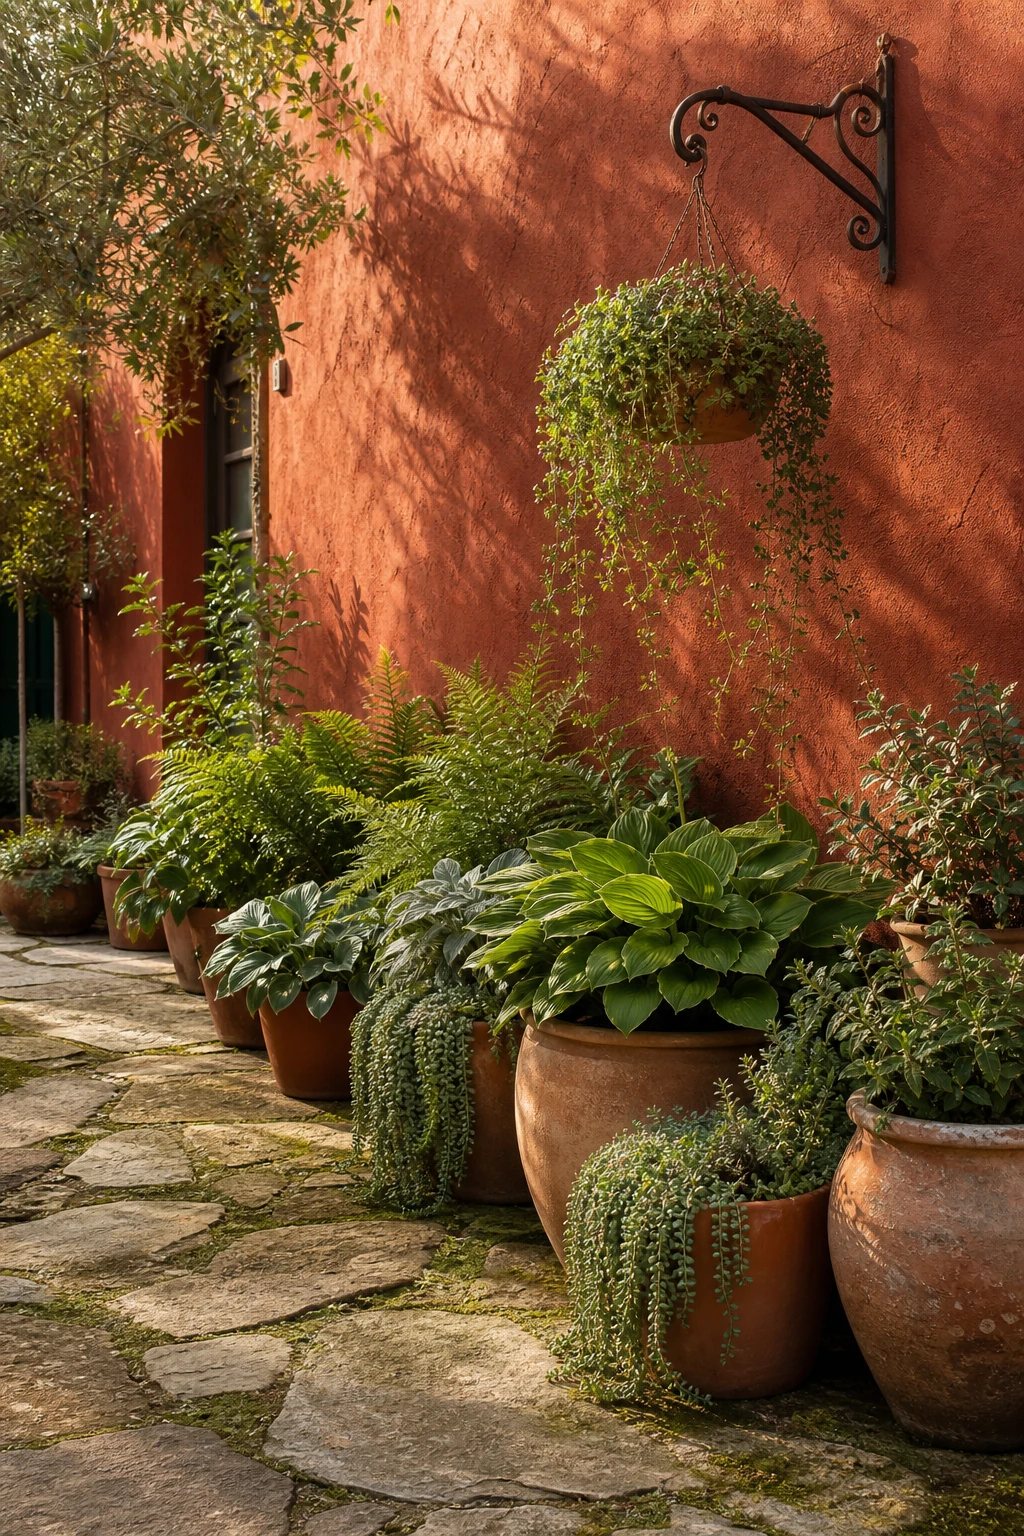
A Terracotta Coloured Garden Wall Makes Every Green Plant in Front of It Look Extraordinary
A rendered garden wall in a deep terracotta shade does something quietly brilliant: it acts as a warm canvas that pulls every shade of green forward and makes foliage look almost luminous. What I love about this move is how effortless it feels once it is done. You get contrast that reads as intentional and considered, not accidental. The wall holds the whole planting scheme together in a way that a plain grey or white surface simply never could.
The Key Details
Unglazed terracotta plant pots
Lime rendered garden wall
Reclaimed stone paving
Wrought iron wall bracket
Layered mixed foliage planting
Pro TipAlways brush a generous test patch and leave it a full day before committing, because terracotta masonry paint dries noticeably darker and warmer than it looks wet.
AvoidPainting the whole wall in one morning means you only ever see it in one light, and a shade that looks perfect at 9am can turn muddy and flat by early evening.
Alan launched Edward George London in 2017. Since completing his masters in Town & Regional Planning (MPlan) he has combined the skills he learned at the University of Sheffield with his passion for design, to help create a foundation for those looking to create a beautiful home.